Backing up your WordPress site is essential to protect your content, design, and data from loss due to hacking, errors, or server issues. This guide walks you through simple, effective methods—using plugins, manual backups, and automated solutions—so you can restore your site quickly if something goes wrong.
Key Takeaways
- Regular backups prevent data loss: Always back up your site before updates, migrations, or major changes.
- Use reliable backup plugins: Tools like UpdraftPlus and BackupBuddy automate the process and save time.
- Store backups offsite: Save copies to cloud services like Google Drive, Dropbox, or Amazon S3 for extra safety.
- Test your backups: A backup is useless if it can’t be restored—regularly test restoration to ensure reliability.
- Manual backups give full control: For advanced users, downloading files via FTP and exporting the database via phpMyAdmin ensures complete coverage.
- Schedule automatic backups: Set daily or weekly backups so you never forget to protect your site.
- Know your hosting options: Some hosts offer built-in backups—check your plan before installing third-party tools.
Why Backing Up Your WordPress Site Matters
Imagine spending months building your WordPress site—only to lose everything because of a plugin conflict, a hacker, or a server crash. That’s why backing up your WordPress site isn’t optional—it’s essential. A backup is like an insurance policy for your website. It lets you restore your content, themes, plugins, and settings quickly and safely.
Whether you’re running a blog, an online store, or a business website, regular backups protect you from unexpected disasters. In this guide, you’ll learn multiple ways to back up your WordPress site—from simple plugin solutions to manual methods—so you can choose what works best for you.
Method 1: Backup WordPress Site Using Plugins (Recommended for Most Users)
Using a backup plugin is the easiest and most reliable way to back up your WordPress site. These tools automate the process, let you schedule backups, and often store copies in the cloud.
Visual guide about How Do You Backup a WordPress Site
Image source: ddgpress.com
Step 1: Choose a Reliable Backup Plugin
Some of the most trusted plugins include:
- UpdraftPlus: Free, user-friendly, and supports cloud storage like Google Drive and Dropbox.
- BackupBuddy: Paid plugin with advanced features like remote storage and migration tools.
- Jetpack Backup: Offers real-time backups with a premium plan.
For beginners, we recommend UpdraftPlus because it’s free, easy to use, and highly rated.
Step 2: Install and Activate the Plugin
- Go to your WordPress dashboard.
- Click Plugins > Add New.
- Search for “UpdraftPlus” and click Install Now.
- Once installed, click Activate.
Step 3: Configure Backup Settings
- Go to Settings > UpdraftPlus Backups.
- Click the Settings tab.
- Choose how often you want backups: daily, weekly, or monthly.
- Select what to include: files, database, or both (always choose both).
- Pick a remote storage location (e.g., Google Drive, Dropbox, or Amazon S3).
- Click Save Changes.
Step 4: Run Your First Backup
- Go back to the Backup/Restore tab.
- Click Backup Now.
- Wait for the process to complete—this may take a few minutes depending on your site size.
- Once done, you’ll see a confirmation message and a list of your backup files.
Pro Tip: Always test your backup by restoring it on a staging site. This ensures it works when you really need it.
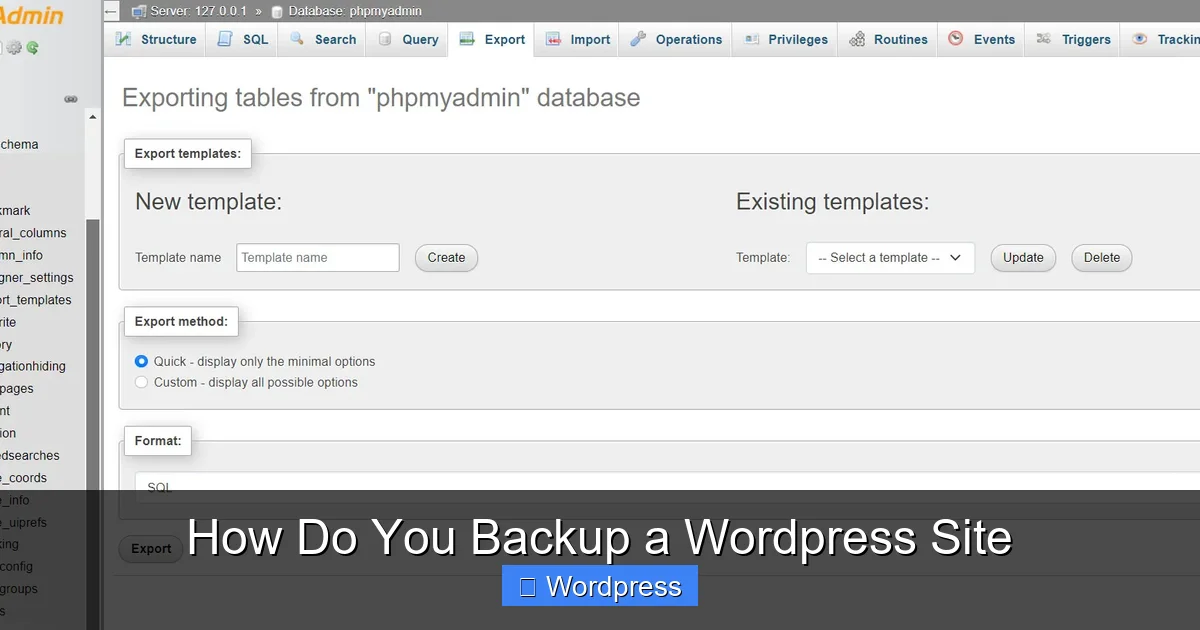
Method 2: Manual Backup via FTP and phpMyAdmin
If you prefer full control or your host doesn’t support plugins, you can back up your site manually. This method involves downloading your site files and exporting your database.
Visual guide about How Do You Backup a WordPress Site
Image source: wpmet.com
Step 1: Download WordPress Files via FTP
- Use an FTP client like FileZilla (free) to connect to your website.
- Enter your FTP credentials (usually found in your hosting control panel).
- Navigate to the root folder of your WordPress site (often called public_html or www).
- Select all files and folders (including wp-content, wp-config.php, etc.).
- Download them to a safe folder on your computer.
Step 2: Export the Database via phpMyAdmin
- Log in to your hosting control panel (like cPanel).
- Find and click phpMyAdmin.
- Select your WordPress database from the left sidebar.
- Click the Export tab at the top.
- Choose Quick export method and SQL format.
- Click Go to download the database file.
Important: Store both the files and database in the same secure location. Label them with the date so you can find them later.
Method 3: Use Your Hosting Provider’s Backup Tools
Many web hosts offer built-in backup solutions. Before installing a plugin, check if your host already provides this feature.
How to Check for Hosting Backups
- Log in to your hosting account (e.g., Bluehost, SiteGround, HostGator).
- Look for a section called Backups, Site Tools, or Snapshots.
- Some hosts take automatic daily backups and let you restore with one click.
For example, SiteGround offers free daily backups with easy restoration. Bluehost includes backup tools in higher-tier plans. Always confirm what’s included in your plan.
Note: Even if your host offers backups, it’s smart to keep your own copies. Host backups can fail or be deleted during migrations.
Best Practices for WordPress Backups
Backing up isn’t just about doing it once—it’s about doing it right and regularly.
1. Schedule Regular Backups
Set up automatic backups weekly or daily, depending on how often you update your site. For busy blogs or online stores, daily backups are ideal.
2. Store Backups in Multiple Locations
Don’t keep all your backups on your server. Use cloud storage like Google Drive, Dropbox, or Amazon S3. This protects you if your server is compromised.
3. Test Your Backups Regularly
A backup is only good if it works. Every few months, try restoring your site on a test server or local environment. This confirms your files and database are intact.
4. Backup Before Major Changes
Always create a backup before:
- Updating WordPress core, themes, or plugins.
- Installing new plugins or themes.
- Migrating your site to a new host.
- Making design or code changes.
For example, if you’re planning to upgrade your WordPress theme, a backup ensures you can revert if something breaks.
5. Keep Old Backups (Temporarily)
Don’t delete old backups immediately. Keep at least 2–3 recent versions in case the latest one is corrupted.
Troubleshooting Common Backup Issues
Sometimes backups fail. Here’s how to fix common problems:
Backup Fails or Times Out
- This often happens with large sites. Try increasing the PHP memory limit in your wp-config.php file.
- Use a plugin that supports chunked backups (like UpdraftPlus).
- Switch to manual backup if plugins keep failing.
Can’t Restore from Backup
- Make sure you’re restoring both files and database.
- Check that the database credentials in wp-config.php match your new environment.
- If using a plugin, ensure it’s the same version used to create the backup.
Backup Files Are Corrupted
- Always download backups immediately after creation.
- Use reliable storage and avoid public Wi-Fi when transferring files.
- Test backups as soon as possible.
Conclusion
Backing up your WordPress site is one of the most important things you can do as a website owner. Whether you use a plugin like UpdraftPlus, manual methods, or your host’s tools, the goal is the same: protect your hard work from unexpected disasters.
Start by choosing a method that fits your skill level and schedule. Set up automatic backups, store them safely offsite, and test them regularly. With these steps, you’ll never have to worry about losing your site again.
Remember: A backup today can save your website tomorrow. Don’t wait—back up your WordPress site now.