This guide walks you through the simple process of installing a WordPress theme from a ZIP file using the built-in WordPress theme installer. You’ll learn how to upload, activate, and troubleshoot your new theme safely—even if you’re a beginner.
Key Takeaways
- Always back up your site before installing a new theme to avoid data loss.
- Use only trusted sources like WordPress.org or reputable developers to download theme ZIP files.
- The WordPress dashboard method is safest for beginners—no FTP or file manager access needed.
- Check theme compatibility with your WordPress version and plugins before installation.
- Activate the theme after upload to see your new design live on your site.
- Customize your theme using the WordPress Customizer or theme options panel.
- Troubleshoot common issues like upload errors or missing stylesheets with simple fixes.
How to Install WordPress Theme from Zip – A Complete Guide
Installing a WordPress theme from a ZIP file is one of the most common tasks for website owners. Whether you’ve purchased a premium theme or downloaded a free one from WordPress.org, the process is straightforward—if you know the steps. In this guide, you’ll learn how to install a WordPress theme from a ZIP file safely and efficiently, even if you’ve never done it before.
We’ll cover everything from preparing your site to activating your new theme and fixing common problems. By the end, you’ll be able to confidently switch themes without breaking your website. Let’s get started!
Why Install a Theme from a ZIP File?
Most custom or premium themes are distributed as ZIP files. This compressed format keeps all theme files—templates, styles, scripts, and images—organized in one package. Installing from a ZIP file ensures you get the complete theme without missing any critical components.
Visual guide about How to Install WordPress Theme from Zip
Image source: visualmodo.com
Unlike default WordPress themes that come pre-installed, third-party themes require manual upload. The good news? WordPress makes this easy with its built-in theme uploader.
Before You Begin: Important Precautions
Before installing any new theme, take these precautions to protect your website:
Visual guide about How to Install WordPress Theme from Zip
Image source: visualmodo.com
1. Back Up Your Website
Always create a full backup of your site—files and database—before making major changes. If something goes wrong, you can restore your site quickly. Use plugins like UpdraftPlus or your hosting provider’s backup tool.
2. Check Theme Compatibility
Make sure the theme supports your current WordPress version. Most modern themes require WordPress 6.0 or higher. Also, check if the theme works with popular plugins like WooCommerce, Yoast SEO, or Elementor.
3. Download from a Trusted Source
Only install themes from reputable sources. Free themes should come from WordPress.org, while premium themes should be downloaded directly from the developer’s site (e.g., ThemeForest, Elegant Themes). Avoid pirated or nulled themes—they often contain malware.
Step-by-Step: How to Install WordPress Theme from Zip
Now that you’re prepared, let’s walk through the installation process. This method uses the WordPress admin dashboard and works for most users.
Visual guide about How to Install WordPress Theme from Zip
Image source: talkerscode.com
Step 1: Log in to Your WordPress Dashboard
Go to your website’s admin area by visiting yoursite.com/wp-admin. Enter your username and password to log in.
Step 2: Navigate to the Themes Section
In the left-hand menu, hover over Appearance and click Themes. This will show you all currently installed themes.
Step 3: Add a New Theme
Click the Add New button at the top of the page. You’ll see a search bar and a list of featured themes. But since you have a ZIP file, don’t search—click the Upload Theme button at the top.
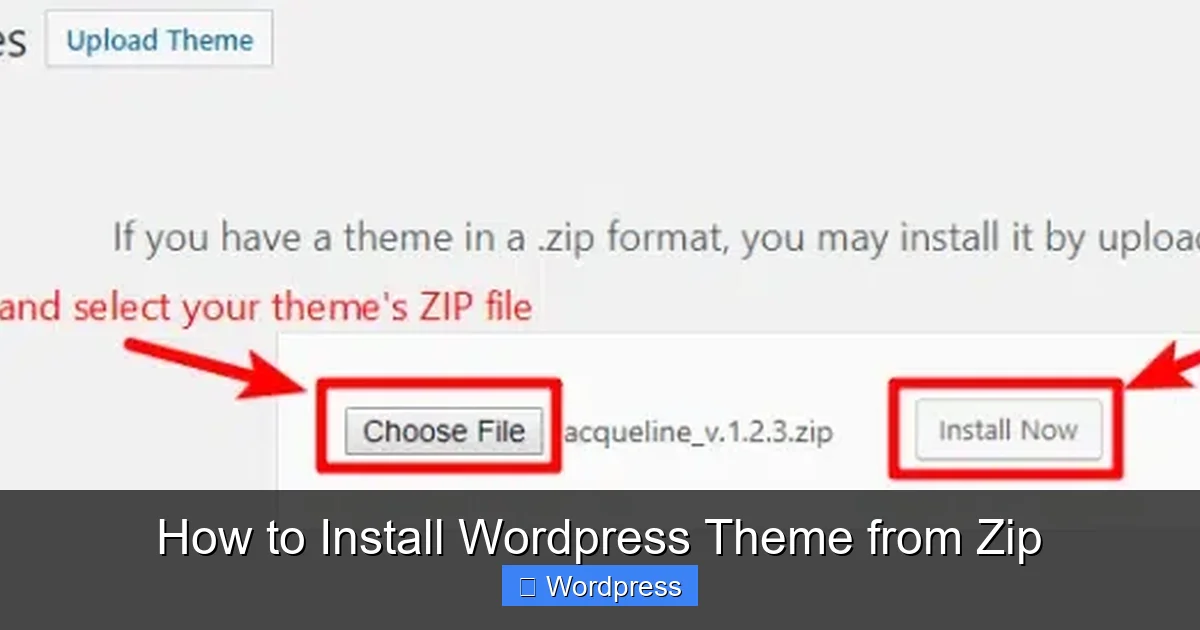
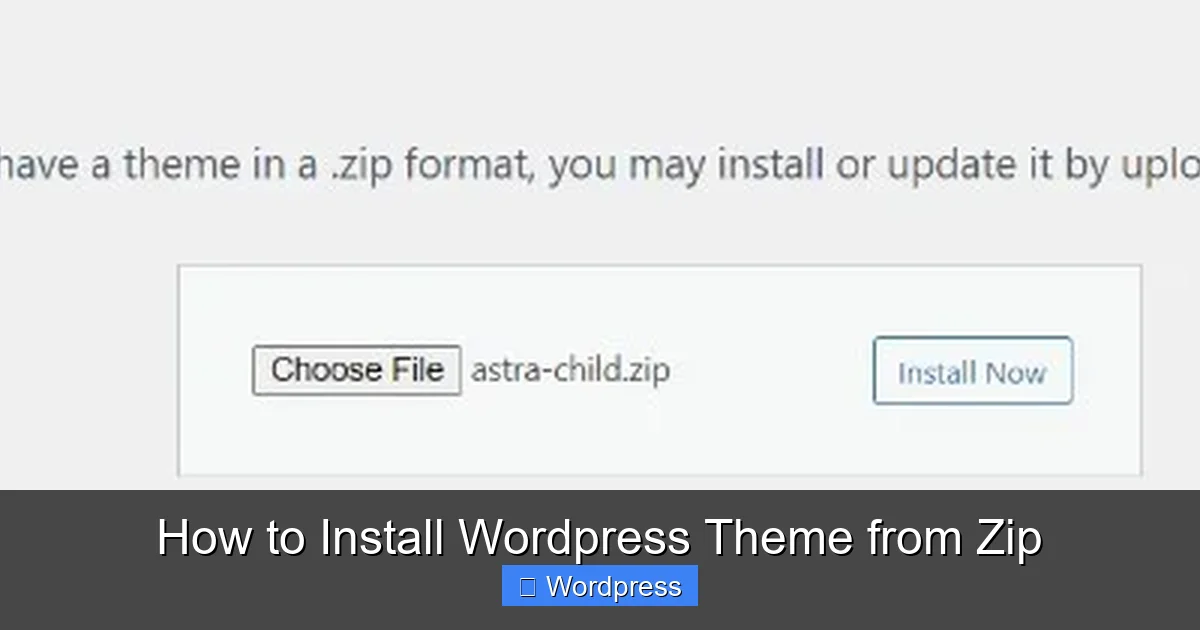
Step 4: Upload the ZIP File
Click Choose File, then browse your computer to locate the theme ZIP file (e.g., my-theme.zip). Select it and click Install Now.
WordPress will upload and extract the theme automatically. This may take a few seconds, depending on file size and your internet speed.
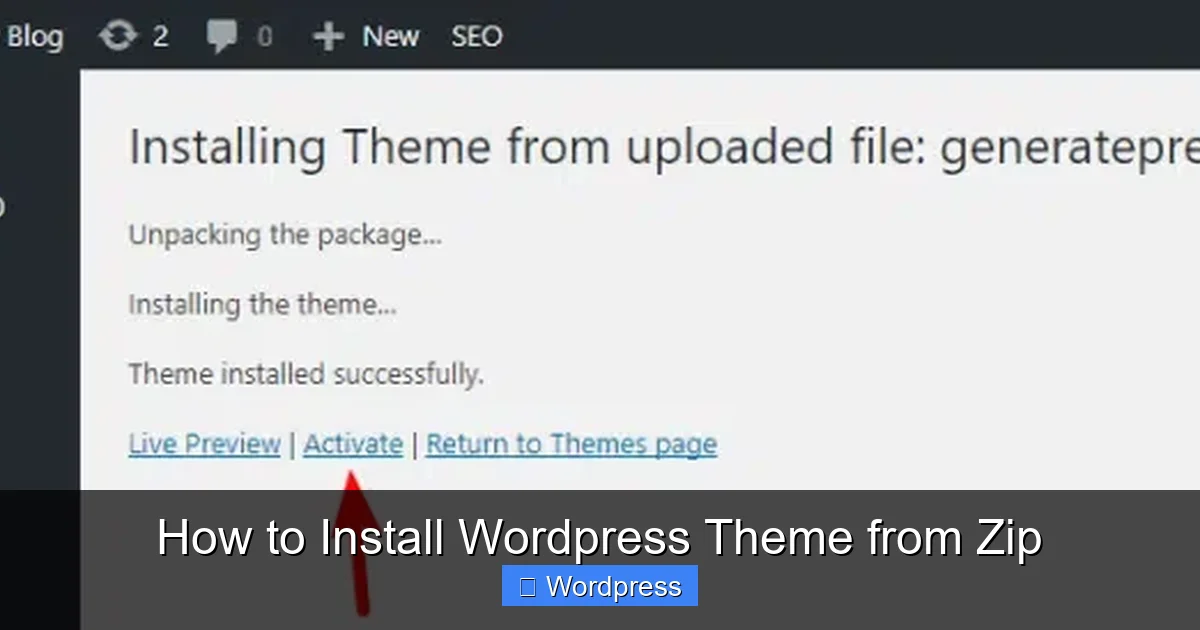
Step 5: Activate the Theme
Once the upload is complete, you’ll see a success message with two options: Activate and Live Preview. Click Activate to make the theme live on your site.
Alternatively, you can click Live Preview to see how the theme looks before going live. This is helpful if you want to test layouts or customize settings first.
What Happens After Activation?
Once activated, your new theme takes over the design of your website. However, you may need to complete a few setup steps:
- Import demo content (if the theme offers it) to match the preview.
- Install required plugins—many themes prompt you to install companion plugins for full functionality.
- Customize the appearance using Appearance > Customize to adjust colors, fonts, logos, and layouts.
- Set up menus and widgets if they don’t carry over from your previous theme.
Some themes include a one-click demo import tool. Check your theme documentation for instructions.
Troubleshooting Common Installation Issues
Even with careful steps, problems can occur. Here’s how to fix the most common issues when installing a WordPress theme from a ZIP file.
1. “The package could not be installed. No style.css found.”
This error means WordPress can’t find the main stylesheet. It usually happens when:
- You uploaded a ZIP file that contains another ZIP (common with premium themes).
- The theme folder is nested inside another folder.
Solution: Extract the ZIP file on your computer. Look for a folder with style.css inside. If you find another ZIP, extract that too. Upload only the inner theme folder as a ZIP.
2. “Maximum upload size exceeded”
Your hosting provider limits file uploads (usually 2MB to 64MB). If your theme ZIP is larger, you’ll see this error.
Solution: Increase the upload limit by editing your php.ini file or using FTP. Alternatively, use the manual theme installation method via FTP.
3. Theme Looks Broken After Activation
If your site looks messy or unstyled, the theme may not be fully compatible or missing assets.
Solution: Revert to a default theme (like Twenty Twenty-Four) temporarily. Check if all required plugins are installed. Clear your browser and site cache. If the issue persists, contact the theme developer.
4. White Screen or “White Screen of Death”
This usually indicates a PHP error, often due to a conflicting plugin or incompatible theme.
Solution: Switch to a default theme via FTP or your hosting file manager. Then deactivate plugins one by one to find the culprit. You can also enable WP_DEBUG in wp-config.php to see error messages.
Best Practices for Theme Installation
Follow these tips to ensure a smooth experience:
- Test on a staging site first if possible. Many hosts offer staging environments.
- Read the theme documentation—it often includes setup guides and FAQs.
- Keep your old theme installed until you’re sure the new one works. You can deactivate a theme in WordPress without deleting it.
- Update your theme regularly to get security patches and new features. Learn how to update a theme on WordPress safely.
- Use a child theme if you plan to customize code. This prevents losing changes during updates. Read more about what a child theme is in WordPress.
Conclusion
Installing a WordPress theme from a ZIP file is a simple process that opens up endless design possibilities for your website. With just a few clicks in your WordPress dashboard, you can transform your site’s look and functionality.
Remember to back up your site, use trusted themes, and follow the steps carefully. If you run into issues, the troubleshooting tips above will help you resolve them quickly. Once your new theme is active, take time to customize it and make it truly yours.
Now that you know how to install a WordPress theme from a ZIP file, you’re ready to explore thousands of beautiful designs. Happy theming!