Clearing cache in WordPress helps improve site performance, fix loading errors, and ensure visitors see your latest updates. This guide covers multiple methods—from plugin-based clearing to browser and server-level cache removal—so you can choose the best approach for your setup.
Key Takeaways
- Cache improves speed but can hide changes: While caching boosts performance, outdated cached files may prevent visitors from seeing recent updates.
- Use a caching plugin for easy management: Plugins like WP Super Cache or W3 Total Cache let you clear site cache with one click.
- Don’t forget browser cache: Clear your browser’s cache if changes still don’t appear after clearing WordPress cache.
- Hosting-level cache matters too: Many hosts (like SiteGround or Bluehost) offer built-in caching—clear it via your hosting dashboard.
- Test after clearing: Always check your site on different devices or in incognito mode to confirm updates are visible.
- Schedule regular cache clearing: If you update content often, consider clearing cache weekly to avoid confusion.
Why Clearing Cache in WordPress Matters
If you’ve ever updated your WordPress site—changed a headline, uploaded a new image, or tweaked your design—only to see the old version when you refresh the page, you’ve likely run into a caching issue. Cache exists to make your site load faster, but it can also delay how quickly your changes go live.
Caching stores static versions of your pages so browsers and servers don’t have to rebuild them every time someone visits. While this is great for speed, it means your visitors might not see your latest content until the cache refreshes. That’s why knowing how to clear cache in WordPress is essential for anyone managing a website.
In this guide, you’ll learn multiple ways to clear cache—whether you’re using a plugin, your hosting provider’s tools, or even your own browser. We’ll keep it simple, practical, and jargon-free.
Method 1: Clear Cache Using a WordPress Plugin
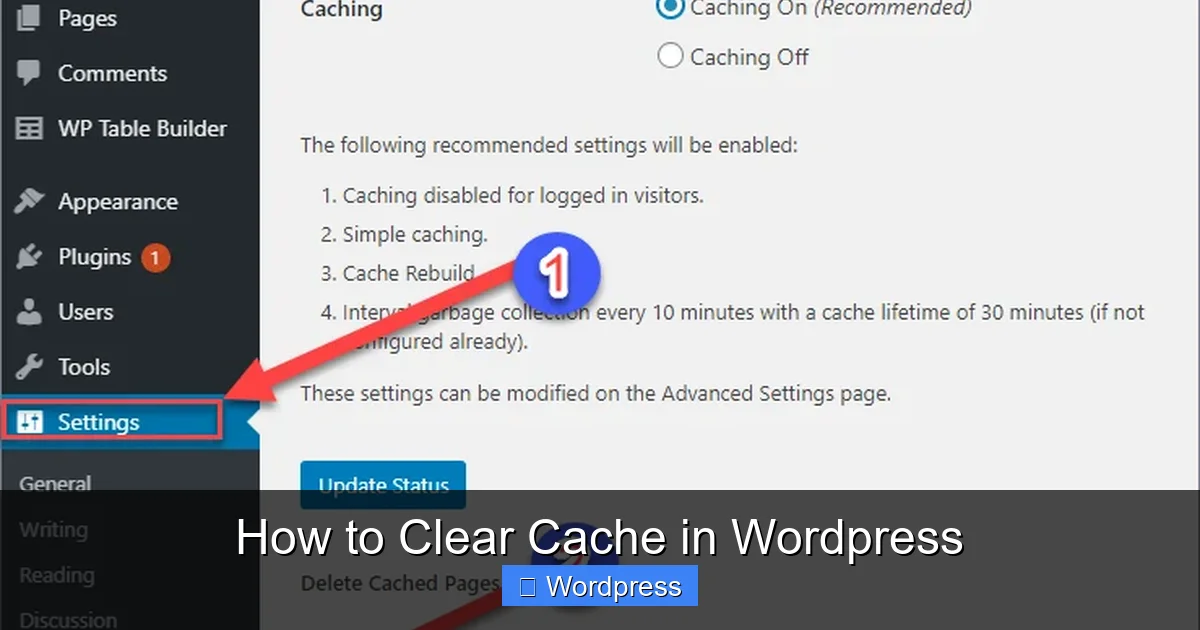
Visual guide about How to Clear Cache in WordPress
Image source: lh5.googleusercontent.com
Most WordPress sites use caching plugins to speed up load times. If you’ve installed one (and you probably have), clearing cache is usually just a button click away.
Step 1: Identify Your Caching Plugin
Common caching plugins include:
– WP Super Cache
– W3 Total Cache
– WP Rocket
– LiteSpeed Cache
Check your WordPress dashboard sidebar. If you see a menu item like “Performance,” “Cache,” or the plugin’s name, you’re likely using one.
Step 2: Clear Cache from the Dashboard
For most plugins, follow these steps:
- Go to WordPress Dashboard > Settings > [Plugin Name] (e.g., “WP Super Cache”).
- Look for a button labeled “Delete Cache,” “Clear All Cache,” or “Purge Cache.”
- Click it. A confirmation message should appear.
Example: In WP Super Cache, go to Settings > WP Super Cache > Delete Cache. In W3 Total Cache, click Performance > Dashboard > Empty All Caches.
Step 3: Verify the Cache Is Cleared
Visit your site in a new browser tab or incognito window. If your recent changes are now visible, the cache was successfully cleared.
Pro Tip: Some plugins also let you clear cache for individual pages. Use this if you only updated one post or page.
Method 2: Clear Browser Cache
Even after clearing your WordPress cache, your browser might still show an old version of your site. This is because browsers store local copies of websites to load them faster.
How to Clear Browser Cache (Step-by-Step)
The steps vary slightly by browser, but here’s how to do it in the most popular ones:
Google Chrome
- Click the three dots in the top-right corner.
- Go to More tools > Clear browsing data.
- Select “Cached images and files”.
- Choose a time range (e.g., “Last hour” or “All time”).
- Click “Clear data”.
Mozilla Firefox
- Click the menu button (three lines) > Settings.
- Go to Privacy & Security.
- Under Cookies and Site Data, click “Clear Data”.
- Check “Cached Web Content” and click “Clear”.
Safari (Mac)
- Go to Safari > Preferences > Advanced.
- Check “Show Develop menu in menu bar”.
- From the menu bar, click Develop > Empty Caches.
Quick Fix: Press Ctrl + F5 (Windows) or Cmd + Shift + R (Mac) to force-reload a page and bypass cache.
Method 3: Clear Hosting-Level Cache
Many web hosts implement their own caching systems to improve performance across all sites on their servers. Even if you clear your WordPress plugin cache, the hosting cache might still serve old content.
Check If Your Host Uses Server Cache
Popular hosts with built-in caching include:
– SiteGround (Dynamic Cache)
– Bluehost (Cache Manager)
– HostGator (Turbo Cache)
– Kinsta (Server-level caching)
– WP Engine (EverCache)
How to Clear Hosting Cache
Log in to your hosting control panel (usually cPanel or a custom dashboard) and look for a cache management tool.
Example: SiteGround
- Log in to your SiteGround account.
- Go to Websites > Site Tools > Speed > Caching.
- Click “Purge All Cache”.
Example: Bluehost
- Log in to your Bluehost dashboard.
- Go to Advanced > Cache Manager.
- Click “Clear Cache”.
Note: If you’re unsure whether your host uses caching, contact their support team. They can confirm and guide you through the process.
Method 4: Clear Cache via .htaccess (Advanced)
If you’re comfortable editing server files, you can manually clear cache by modifying your .htaccess file. This method is less common but useful if plugins aren’t working.
Warning: Proceed with Caution
Editing .htaccess incorrectly can break your site. Always back up the file first.
Steps to Clear Cache via .htaccess
- Access your site via FTP or your hosting file manager.
- Navigate to the root directory (usually
public_html). - Find and download a copy of
.htaccessas a backup. - Open the file in a text editor.
- Look for cache-related rules (e.g.,
ExpiresByTypeorCache-Control). - Temporarily comment them out by adding
#at the start of each line. - Save and upload the file.
- Refresh your site to see if changes appear.
- Re-enable the rules once confirmed.
Alternative: Instead of editing, you can rename the file to .htaccess_old. WordPress will generate a new one automatically.
Troubleshooting Common Cache Issues
Sometimes, clearing cache doesn’t solve the problem. Here’s how to fix common issues:
Changes Still Not Visible?
- Clear cache in all layers: plugin, browser, and hosting.
- Try accessing your site from a different device or network.
- Use a tool like How to Clear Browser History to ensure no local data is interfering.
Site Breaks After Clearing Cache?
- This is rare but can happen if a plugin relies on cached data.
- Reactivate your caching plugin and check for errors.
- If issues persist, restore from a backup or contact support.
Cache Keeps Reappearing Too Fast?
- Adjust your plugin’s cache expiration settings.
- For example, in W3 Total Cache, go to Performance > Page Cache > Cache Timeout and increase the duration.
Best Practices for Managing WordPress Cache
To avoid constant cache headaches, follow these tips:
- Clear cache after major updates: After changing themes, updating plugins, or editing content.
- Use a reliable caching plugin: WP Rocket and LiteSpeed Cache are user-friendly and well-supported.
- Test in incognito mode: This bypasses most local caches and gives a fresh view.
- Schedule regular maintenance: Clear cache weekly if you update content frequently.
- Monitor site speed: Use tools like GTmetrix or Google PageSpeed Insights to ensure caching helps, not hurts.
If you’re updating your site’s design, consider reading our guide on How to Apply WordPress Theme to ensure smooth transitions. And if you’re using a child theme for safer customization, check out What Is a Child Theme in WordPress for best practices.
Conclusion
Clearing cache in WordPress doesn’t have to be confusing. Whether you’re using a plugin, your browser, or your hosting provider’s tools, the process is straightforward once you know where to look. Regular cache management ensures your site stays fast, up-to-date, and error-free.
Remember: always clear cache at multiple levels if changes aren’t showing. And when in doubt, test in incognito mode or on a different device. With these methods, you’ll keep your WordPress site running smoothly and looking exactly how you intended.