A WordPress 404 redirect helps visitors and search engines find the right content when a page is missing. Instead of showing a dead end, you can guide users to helpful pages, reduce bounce rates, and protect your site’s SEO rankings.
Imagine clicking a link—maybe from an email, social media, or Google search—only to land on a page that says “404 Not Found.” Frustrating, right? That’s exactly what happens when your WordPress site shows a default 404 error without any helpful guidance. But here’s the good news: you can fix this with a smart WordPress 404 redirect strategy.
A 404 error means the page someone is trying to reach doesn’t exist on your server. This could happen because the URL changed, the page was deleted, or there’s a typo in the link. While some 404s are unavoidable, how you handle them makes a huge difference. Instead of leaving visitors confused, a well-planned redirect or custom 404 page can guide them to useful content, keep them on your site, and even improve your SEO.
Key Takeaways
- 404 errors hurt user experience: Visitors get frustrated when they land on a broken page with no clear next step.
- Redirects preserve SEO value: Proper 404 redirects pass link equity and help search engines understand your site structure.
- Custom 404 pages improve engagement: A well-designed page with links and search can turn a dead end into a discovery moment.
- Use 301 redirects for moved content: If a page has permanently moved, a 301 redirect tells Google the new location.
- Plugins simplify redirect management: Tools like Redirection make it easy to track and fix broken links without coding.
- Monitor 404s regularly: Use Google Search Console to find and fix broken links before they impact rankings.
- Test your redirects: Always check that redirects work correctly and don’t create loops or errors.
Quick Answers to Common Questions
What is a WordPress 404 redirect?
A WordPress 404 redirect sends visitors from a broken or missing page to a working one, improving user experience and SEO.
Should I redirect all 404s to the homepage?
No. Only redirect to relevant pages. Sending users to the homepage can confuse them and hurt SEO.
How do I find 404 errors on my site?
Use Google Search Console or a plugin like Redirection to monitor and log 404 errors.
Can I customize my 404 page without coding?
Yes. Use the WordPress Customizer, a page builder, or a plugin like 404page to design a custom 404 page easily.
Do 404 errors hurt my SEO?
A few 404s are normal, but too many can signal a poorly maintained site. Fix important ones with 301 redirects.
📑 Table of Contents
Why WordPress 404 Redirects Matter
404 errors aren’t just annoying—they can hurt your website’s performance in several ways. First, they create a poor user experience. Visitors who hit a dead end are more likely to leave your site immediately, increasing your bounce rate. Second, search engines like Google see frequent 404s as a sign of a poorly maintained site, which can affect your rankings over time.
But when you use a WordPress 404 redirect correctly, you turn a potential negative into a positive. For example, if you’ve moved a blog post to a new URL, setting up a 301 redirect ensures that anyone using the old link lands on the new one. This preserves the traffic and SEO value that the old page had built up. It also helps Google understand that the content still exists—just in a new location.
How 404s Impact SEO
Search engines crawl your site regularly to index new content and check for changes. When they encounter a 404 error, they note it—but they don’t penalize you for a few broken links. However, if there are too many, or if important pages are missing, it can slow down crawling and reduce your site’s overall authority.
Using 301 redirects for permanently moved content is one of the best ways to maintain SEO strength. These redirects pass about 90–95% of the link equity (also called “link juice”) from the old URL to the new one. That means your new page can rank just as well—or even better—than the old one.
Types of WordPress 404 Redirects
Not all redirects are the same. Understanding the different types helps you choose the right one for each situation.
301 Redirect (Permanent)
This is the most common and recommended type for handling moved or deleted content. A 301 redirect tells browsers and search engines that the page has permanently moved to a new location. It’s ideal when you’ve restructured your site, renamed a page, or merged content.
For example, if you used to have a page at yoursite.com/old-blog and now it’s at yoursite.com/blog, a 301 redirect ensures anyone visiting the old link gets sent to the new one automatically.
302 Redirect (Temporary)
A 302 redirect is used when a page is temporarily unavailable—like during maintenance or a short-term promotion. Search engines treat this differently: they keep the original URL in their index and don’t pass full link equity. Use this sparingly, as it’s not ideal for long-term fixes.
Custom 404 Page (No Redirect)
Sometimes, there’s no direct replacement for a missing page. In those cases, a custom 404 page is your best option. Instead of showing a generic error, you can design a friendly page that includes a search bar, links to popular content, or a call-to-action like “Back to Home.”
This approach keeps users engaged even when they hit a dead end. It’s especially useful for sites with large archives or frequent content updates.
How to Set Up a WordPress 404 Redirect
There are several ways to implement a WordPress 404 redirect, depending on your technical comfort level and needs.
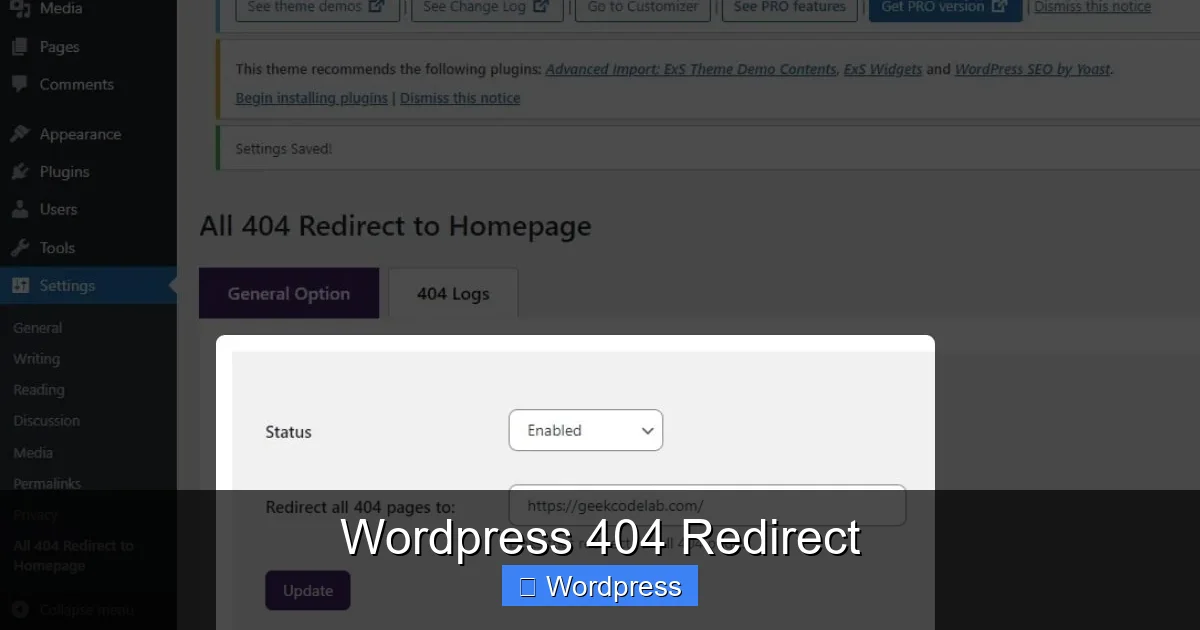
Visual guide about WordPress 404 Redirect
Image source: geekcodelab.com
Method 1: Using a Plugin (Recommended for Beginners)
The easiest way to manage redirects is with a plugin. Redirection is a popular, free plugin that lets you set up 301 redirects, monitor 404 errors, and even log which URLs are being accessed incorrectly.
To use it:
- Go to Plugins > Add New in your WordPress dashboard.
- Search for “Redirection” and install it.
- Activate the plugin and go to Tools > Redirection.
- Under the “Redirects” tab, enter the source URL (the broken one) and the target URL (where it should go).
- Choose “301 – Moved Permanently” and save.
This method is simple, reliable, and doesn’t require editing code. It’s perfect for bloggers, small business owners, and anyone who wants a no-fuss solution.
Method 2: Editing the .htaccess File (Advanced)
If you’re comfortable with code, you can add redirects directly to your site’s .htaccess file. This file controls how your server handles requests and is located in your WordPress root directory.
To add a 301 redirect:
Redirect 301 /old-page/ https://yoursite.com/new-page/
Always back up your .htaccess file before making changes. A single typo can break your entire site. If you’re unsure, stick with a plugin.
Method 3: Using Your Theme’s 404.php File
Every WordPress theme has a 404.php file that controls what users see when they hit a missing page. You can customize this file to include automatic redirects or smart suggestions.
For example, you could add code that checks if the missing URL is similar to an existing page and redirects accordingly. Or, you could include a list of recent posts or a search form to help users find what they’re looking for.
To edit this file, go to Appearance > Theme File Editor and look for 404.php. If you’re using a child theme, make changes there to avoid losing them during updates.
Creating a Custom 404 Page That Converts
A great 404 page does more than just say “Oops!”—it helps users continue their journey on your site. Think of it as a safety net.
Key Elements of a High-Converting 404 Page
- A clear message: Use friendly, conversational language like “We can’t find that page—but we’ve got plenty of great content!”
- A search bar: Let users search for what they’re looking for.
- Links to popular pages: Include your homepage, blog, contact page, or top categories.
- Visual appeal: Add a fun illustration or branded image to keep it light.
- Call-to-action: Encourage users to subscribe, shop, or explore more.
For inspiration, check out how major brands handle 404s. GitHub, for example, uses a playful octocat character and links to key sections. Mailchimp shows a dancing chimp and a search box. These designs turn frustration into delight.
How to Customize Your 404 Page in WordPress
Most themes allow you to edit the 404 page through the WordPress Customizer or by modifying the 404.php file. If you’re using a page builder like Elementor, you can even design a fully custom 404 page without touching code.
Go to Appearance > Customize > Additional CSS to style your 404 page, or use a plugin like 404page to manage it from the dashboard.
Monitoring and Fixing 404 Errors
Even with the best setup, 404s will happen. The key is to catch them early and fix them fast.
Use Google Search Console
Google Search Console (GSC) is a free tool that shows you which pages on your site are returning 404 errors. To use it:
- Sign in to Google Search Console.
- Select your property.
- Go to Pages > Not Found (404).
- Review the list and decide whether to redirect, restore, or remove each URL.
Focus on high-traffic or important pages first. If a page had backlinks or ranked well, it’s worth setting up a redirect.
Regular Site Audits
Use tools like Screaming Frog or Ahrefs to crawl your site and find broken internal links. Fixing these improves navigation and helps search engines crawl your site more efficiently.
You can also use the Fix Broken Links in WordPress Without Plugin guide to clean up internal links manually.
Best Practices for WordPress 404 Redirects
- Don’t redirect everything to the homepage: This confuses users and search engines. Only redirect to relevant, related content.
- Avoid redirect chains: Don’t create a loop where Page A redirects to Page B, which redirects to Page C. Keep it direct.
- Test after setup: Always visit the old URL to confirm the redirect works.
- Update internal links: If you’ve moved a page, update any internal links pointing to the old URL.
- Keep a redirect log: Track your redirects so you can remove outdated ones later.
Conclusion
Handling 404 errors the right way is a small but powerful way to improve your WordPress site. A smart WordPress 404 redirect strategy keeps users happy, protects your SEO, and turns potential dead ends into opportunities.
Whether you use a plugin, edit code, or design a custom 404 page, the goal is the same: guide visitors to where they want to go. Start by auditing your site for broken links, set up redirects for moved content, and create a helpful 404 page. With these steps, you’ll build a more resilient, user-friendly website that performs better in search results.
Frequently Asked Questions
How do I set up a 301 redirect in WordPress?
You can use a plugin like Redirection or edit the .htaccess file. Plugins are easier and safer for most users.
What’s the difference between a 301 and 302 redirect?
A 301 redirect is permanent and passes SEO value. A 302 is temporary and doesn’t pass full link equity.
Can I redirect a 404 to a different domain?
Yes, but only if the content has truly moved. Use a 301 redirect and update any internal links if possible.
Do I need to fix every 404 error?
Focus on high-traffic or important pages. Low-traffic or outdated pages can often be left as-is or deleted.
Will a custom 404 page improve my rankings?
Not directly, but it reduces bounce rates and keeps users engaged, which can indirectly support SEO.
How often should I check for 404 errors?
Check monthly using Google Search Console or a monitoring plugin to catch new broken links early.