Creating an HTML sitemap in WordPress improves site navigation for visitors and helps search engines crawl your content more effectively. This guide walks you through three simple methods: using a plugin, adding custom code, or building one with Elementor.
Key Takeaways
- Boost SEO and usability: An HTML sitemap helps users and search engines find all your pages quickly.
- Use plugins for simplicity: Tools like WP Sitemap Page make creating a sitemap fast and code-free.
- Custom code offers flexibility: Adding a shortcode or template gives full control over design and content.
- Elementor integration works well: Visual builders let you design a stylish sitemap without touching code.
- Keep it updated automatically: Choose methods that dynamically include new pages and posts.
- Place it where users can find it: Add your sitemap to the footer, menu, or a dedicated page for maximum visibility.
Why You Need an HTML Sitemap in WordPress
An HTML sitemap is a user-friendly page that lists all the important pages on your website in an organized way. Unlike XML sitemaps (which are for search engines), HTML sitemaps help real people navigate your site—especially if they can’t find what they’re looking for through menus or search.
Having one can reduce bounce rates, improve user experience, and even support SEO. Search engines like Google appreciate sites that are easy to navigate, and a well-structured HTML sitemap signals that your site is organized and thorough.
In this guide, you’ll learn three reliable ways to create an HTML sitemap in WordPress: using a plugin, adding custom code, or building one visually with Elementor. Each method suits different skill levels, so you can pick the one that fits your comfort zone.
Method 1: Create an HTML Sitemap Using a Plugin (Easiest)
Visual guide about How to Create Html Sitemap in WordPress
Image source: oflox.com
If you’re not comfortable with code, using a plugin is the fastest and safest way to add an HTML sitemap to your WordPress site. The most popular and reliable option is WP Sitemap Page.
Step 1: Install and Activate WP Sitemap Page
Go to your WordPress dashboard. Click Plugins > Add New. In the search bar, type “WP Sitemap Page.” Find the plugin by Mathieu Chartier and click Install Now, then Activate.
Step 2: Add the Sitemap to a Page
Once activated, create a new page by going to Pages > Add New. Give it a title like “Site Map” or “Sitemap.”
In the content area, insert the following shortcode:
[wp_sitemap_page]
This shortcode will automatically generate a list of all your published pages. If you want to include posts, categories, or custom post types, you can customize the shortcode. For example:
[wp_sitemap_page only="page,post"]
This version shows both pages and blog posts.
Step 3: Publish and Link Your Sitemap
Click Publish to make your sitemap live. Now, add a link to it in your website’s footer or main menu so visitors can easily find it. Go to Appearance > Menus, select your menu, and add the new sitemap page.
Tips for Using WP Sitemap Page
- Use the
excludeparameter to hide specific pages:[wp_sitemap_page exclude="10,15"] - Add a description above the shortcode to explain what the sitemap is for.
- Style it with CSS if needed—most themes will format it nicely by default.
Method 2: Create an HTML Sitemap with Custom Code (Advanced)
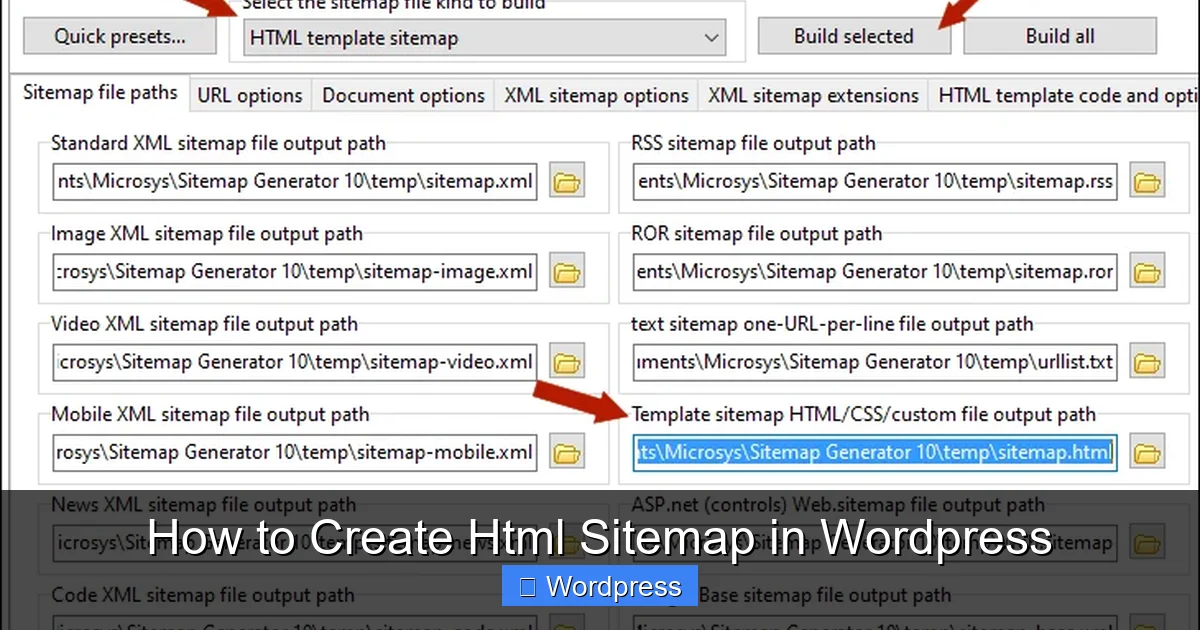
Visual guide about How to Create Html Sitemap in WordPress
Image source: microsystools.com
If you prefer more control or want to avoid plugin overload, you can create a sitemap using a custom shortcode or template. This method requires basic familiarity with PHP and WordPress functions.
Step 1: Add a Custom Shortcode to Your Theme
Go to Appearance > Theme File Editor (or use FTP/SFTP to access your theme files). Open the functions.php file of your active theme.
Add the following code at the bottom:
function custom_html_sitemap() {
$output = 'Pages

Visual guide about How to Create Html Sitemap in WordPress
Image source: webusupload.apowersoft.info
';
$output .= wp_list_pages(array(
'title_li' => '',
'echo' => false
));
$output .= 'Blog Posts
';
$posts = get_posts(array(
'numberposts' => -1,
'post_status' => 'publish'
));
$output .= '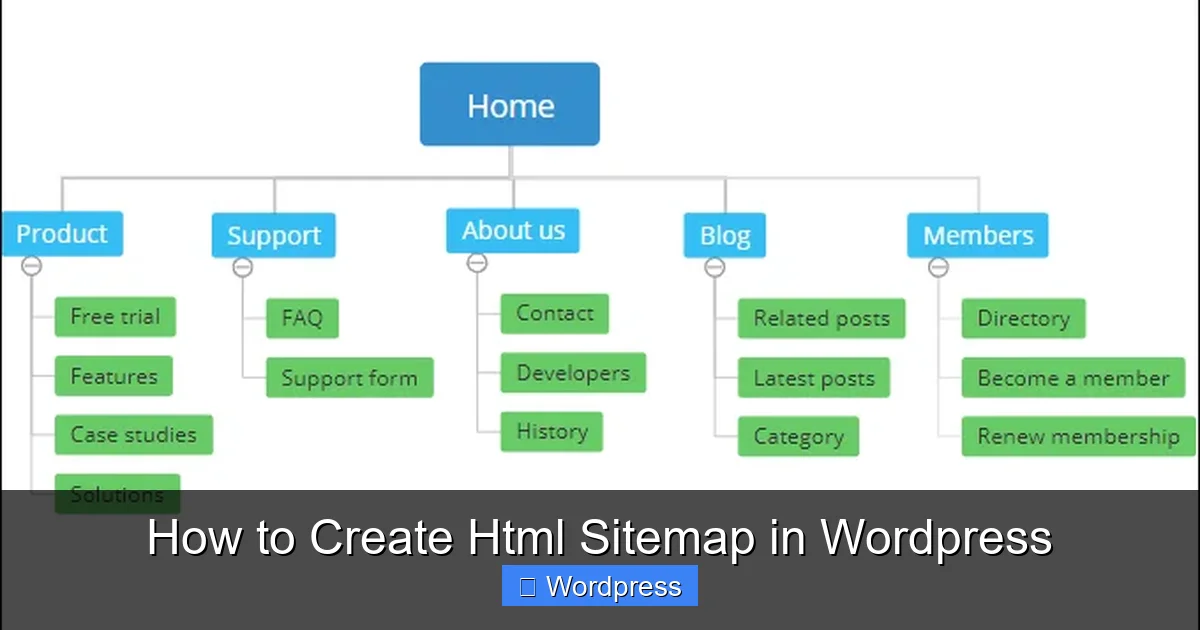
- ';
foreach ($posts as $post) {
$output .= '
- ' . esc_html($post->post_title) . ' '; } $output .= '
Step 2: Use the Shortcode on a Page
Now go to Pages > Add New, title it “Sitemap,” and insert the shortcode:
[custom_sitemap]
Publish the page. Your sitemap will now display all pages and published blog posts in a clean list format.
Step 3: (Optional) Create a Custom Page Template
For even more control, create a custom page template. In your theme folder, create a new file called page-sitemap.php and add:
Then, when creating a new page, select “HTML Sitemap” from the Template dropdown in the Page Attributes box.
Tips for Custom Code Method
- Always back up your site before editing theme files.
- Use a child theme to avoid losing changes during updates.
- You can extend the code to include custom post types or categories.
Method 3: Build an HTML Sitemap with Elementor (Visual Builder)
If you use Elementor, you can create a beautiful, customized sitemap without any code. This method is great for designers or those who want full visual control.
Step 1: Create a New Page
Go to Pages > Add New, name it “Sitemap,” and click Edit with Elementor.
Step 2: Add a Heading and Structure
Drag a Heading widget to the canvas and type “Site Map.” Then add two more headings: “Pages” and “Blog Posts.”
Step 3: Use the Posts and Pages Widgets
For the “Pages” section, use the Posts widget (even though it says “Posts,” it can display pages). In the Content tab, set:
- Post Type: Page
- Order By: Menu Order or Title
- Pagination: Off
For the “Blog Posts” section, add another Posts widget and set:
- Post Type: Post
- Order By: Date or Title
- Number of Posts: -1 (to show all)
Step 4: Style and Publish
Use Elementor’s styling options to adjust fonts, spacing, and colors. You can even add icons or columns for a more polished look. Once satisfied, click Publish.
Tips for Elementor Sitemaps
- Use the Inner Section widget to create columns for better layout.
- Add a search bar using the Search Form widget for extra usability.
- Consider linking to category or tag archives for deeper navigation.
Troubleshooting Common Issues
Sitemap Not Updating Automatically?
Most plugin and code-based sitemaps update automatically when you publish new content. If not, clear your cache (from plugins like WP Super Cache or your hosting provider).
Pages or Posts Missing?
Check if the content is published and not set to private. Also, verify that your shortcode or query includes the correct post types.
Styling Looks Off?
Add custom CSS via Appearance > Customize > Additional CSS. For example:
.sitemap-content ul { list-style: disc; margin-left: 20px; }
Plugin Conflicts?
If your sitemap breaks after a plugin update, try deactivating other plugins one by one to find the culprit.
Best Practices for HTML Sitemaps
- Keep it simple: Avoid clutter. Group content logically (e.g., Pages, Blog, Products).
- Update regularly: If using a manual method, review it periodically.
- Link it in the footer: Most users expect to find a sitemap link at the bottom of the page.
- Don’t overdo it: Only include important, public-facing pages—avoid admin or duplicate content.
- Test on mobile: Ensure your sitemap is readable on all devices.
Conclusion
Creating an HTML sitemap in WordPress is a smart move for both users and SEO. Whether you use a plugin like WP Sitemap Page, add custom code, or build one with Elementor, the process is straightforward and highly beneficial.
Choose the method that matches your skill level and site needs. Once your sitemap is live, don’t forget to link it in your footer or main menu so visitors can easily access it. A well-organized site structure not only helps people find what they need—it also shows search engines that your site is professional and user-focused.
Start today, and give your audience one more reason to stay longer and explore more.