This guide walks you through how to create a sidebar in WordPress Elementor, whether you’re using the free or Pro version. You’ll learn to build custom sidebars, add widgets, and style them to match your site design—all without touching code.
Key Takeaways
- Elementor Pro unlocks full sidebar control: The Pro version lets you create dynamic, reusable sidebars with drag-and-drop ease.
- Sidebars enhance user experience: They help organize content, display calls-to-action, and improve site navigation.
- You can style sidebars to match your theme: Use Elementor’s design tools to customize colors, spacing, and typography.
- Widgets are key sidebar elements: Add search bars, recent posts, social links, and more using built-in widgets.
- Sidebars work on any page or post: Assign your custom sidebar to specific pages, posts, or site-wide layouts.
- Troubleshooting is simple: Common issues like missing sidebars or styling conflicts can be fixed with a few quick checks.
- No coding required: Everything is done visually in Elementor, making it beginner-friendly.
Introduction: Why Add a Sidebar in WordPress Elementor?
If you’re building a website with WordPress and Elementor, you’ve probably noticed how flexible and powerful this combo is. But one feature that can take your site from good to great is a well-designed sidebar. A sidebar gives you extra space to highlight important content—like recent blog posts, email signup forms, or social media links—without cluttering your main content area.
In this guide, you’ll learn how to create a sidebar in WordPress Elementor from scratch. Whether you’re using the free version or Elementor Pro, we’ll cover all the steps, tips, and tricks to help you build a sidebar that looks professional and works perfectly on any device. By the end, you’ll be able to customize, style, and assign your sidebar exactly where you want it—no coding needed.
What Is a Sidebar and Why Use One?
A sidebar is a vertical column typically placed on the right or left side of your webpage. It’s separate from the main content area and is perfect for displaying secondary information. Think of it as your website’s “sidekick”—always there to support the main content.
Here’s why sidebars are useful:
- Improved navigation: Visitors can quickly find related posts, categories, or search your site.
- Lead generation: Add email opt-in forms, download buttons, or special offers.
- Content discovery: Show recent posts, popular articles, or featured products.
- Brand consistency: Use the sidebar to reinforce your brand with logos, taglines, or social links.
With Elementor, creating and customizing a sidebar is easier than ever—especially if you’re using Elementor Pro.
Prerequisites: What You Need Before Starting
Before we dive into building your sidebar, make sure you have the following:
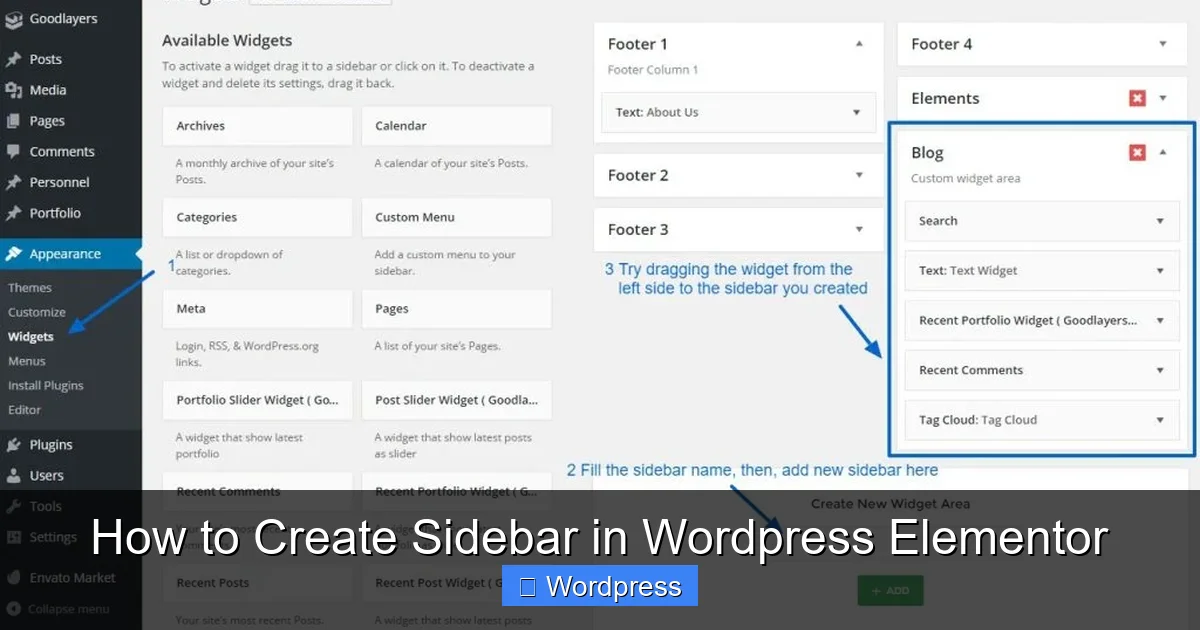
Visual guide about How to Create Sidebar in WordPress Elementor
Image source: docs.goodlayers.com
- WordPress installed: Your site should be running on WordPress (self-hosted, not WordPress.com).
- Elementor plugin active: Install and activate Elementor from the WordPress plugin directory.
- Elementor Pro (recommended): While you can create basic sidebars with the free version, Elementor Pro gives you full control over layout and placement. If you don’t have it yet, consider upgrading for advanced features.
- A compatible theme: Most modern themes work well with Elementor. If you’re starting fresh, consider using a lightweight theme like Hello Elementor.
Once you’ve got these in place, you’re ready to build your first sidebar.
Step 1: Create a New Template in Elementor
The best way to create a reusable sidebar in Elementor is by using a template. Templates let you design once and use everywhere—on pages, posts, or even across your entire site.
How to Create a Sidebar Template
- Go to your WordPress dashboard.
- Navigate to Templates > Theme Builder.
- Click Add New and select Section.
- Name your template (e.g., “Custom Sidebar”) and click Create Template.
Now you’re in the Elementor editor, ready to design your sidebar.
Step 2: Design Your Sidebar Layout
In the Elementor editor, you’ll see a blank canvas. This is where you’ll build your sidebar content.
Add a Section
- Click the + icon to add a new section.
- Choose a single-column layout (100% width).
- This will be the container for all your sidebar widgets.
Add Widgets to Your Sidebar
Now, drag and drop widgets from the Elementor panel into your section. Here are some popular choices:
- Heading: Add a title like “Recent Posts” or “Stay Updated”.
- Search Form: Let visitors search your site.
- Recent Posts: Show your latest blog entries.
- Categories: Help users browse by topic.
- Social Icons: Link to your Facebook, Instagram, or Twitter.
- Button: Add a call-to-action like “Download Free Guide”.
- Shortcode: Insert third-party plugins (e.g., email forms).
Arrange the widgets in the order you want them to appear. You can reorder them by dragging.
Step 3: Style Your Sidebar
Once your content is in place, it’s time to make it look good. Elementor’s styling options let you customize every detail.
Customize Colors and Typography
- Select the section and go to the Style tab.
- Change the background color to match your site (e.g., light gray, white, or a brand color).
- Adjust padding to add space inside the sidebar (try 20–30px).
- Set border radius for rounded corners (optional).
- Use the Typography settings to choose fonts, sizes, and colors for headings and text.
Add Spacing Between Widgets
- Click on each widget and go to the Advanced tab.
- Under Padding or Margin, add space above or below the widget.
- This prevents content from looking cramped.
Make It Responsive
- Use the responsive mode (desktop, tablet, mobile icons) to preview how your sidebar looks on different devices.
- Adjust font sizes, padding, or hide certain widgets on mobile if needed.
Step 4: Save and Assign Your Sidebar
After designing your sidebar, save it as a template so you can reuse it.
Save the Template
- Click the Update button in the Elementor editor.
- Your sidebar template is now saved in Templates > Saved Templates.
Assign the Sidebar to Pages or Posts
Now, decide where you want your sidebar to appear. You can assign it to:
- Specific pages (e.g., blog posts)
- All posts
- Entire site (via theme builder)
Using Elementor Theme Builder (Pro Feature)
- Go to Templates > Theme Builder.
- Click Add New and choose Single Post or Archive.
- Design your page layout and insert your sidebar template using the Template widget.
- Set display conditions (e.g., “All Posts” or “Category: Blog”).
This method gives you full control over where the sidebar appears and how it integrates with your content.
Alternative: Add Sidebar to a Page Manually
If you’re not using Theme Builder, you can still add your sidebar to individual pages.
Insert Sidebar into a Page
- Edit a page or post with Elementor.
- Add a new section with a two-column layout (e.g., 70/30 split).
- In the narrower column (right or left), insert the Template widget.
- Select your saved sidebar template.
- Update the page.
This method works well for one-off pages but isn’t as scalable as using Theme Builder.
Troubleshooting Common Sidebar Issues
Even with Elementor’s simplicity, you might run into a few hiccups. Here’s how to fix them:
Sidebar Not Showing Up
- Check if the template is correctly assigned in Theme Builder.
- Ensure display conditions match the page you’re viewing.
- Clear your cache (plugin or browser).
Styling Looks Off
- Make sure your theme isn’t overriding Elementor styles.
- Use Custom CSS in the Advanced tab if needed. For more on adding CSS, check out our guide on the best way to add CSS in WordPress.
- Check for conflicting plugins.
Sidebar Overlaps Content on Mobile
- Use responsive controls to adjust column widths.
- Set the sidebar column to stack below the main content on mobile.
- Reduce padding or font size for smaller screens.
Widgets Not Appearing
- Ensure widgets are supported in your version of Elementor.
- Some widgets (like Recent Posts) require content to exist (e.g., published posts).
Pro Tips for Better Sidebars
Want to take your sidebar to the next level? Try these expert tips:
- Keep it simple: Don’t overload your sidebar with too many widgets. 3–5 elements are usually enough.
- Use visuals: Add icons, images, or buttons to make it more engaging.
- Test on mobile: Always check how your sidebar looks on phones and tablets.
- Update regularly: Refresh content like “Recent Posts” or seasonal offers.
- Track performance: Use analytics to see if your sidebar drives clicks or conversions.
Conclusion: Master Your Sidebar with Elementor
Creating a sidebar in WordPress Elementor is a smart way to boost engagement, improve navigation, and showcase important content. With Elementor’s visual editor, you can design a custom sidebar in minutes—no coding required. Whether you’re using the free version or Elementor Pro, the process is intuitive and flexible.
Remember to keep your sidebar clean, responsive, and aligned with your brand. Use templates to reuse your design across multiple pages, and don’t forget to test on different devices. If you run into issues, the troubleshooting tips above will help you get back on track.
Now that you know how to create a sidebar in WordPress Elementor, it’s time to put it into action. Start building, experimenting, and refining until your sidebar becomes a valuable part of your website’s user experience.