Creating a sticky header in WordPress improves navigation and user experience by keeping your menu visible as visitors scroll. This guide covers multiple methods—using built-in theme options, popular page builders like Elementor, plugins, and custom CSS—so you can choose the best approach for your site.
Key Takeaways
- Sticky headers enhance usability: They keep navigation menus accessible at all times, improving site navigation and engagement.
- Many WordPress themes support sticky headers natively: Check your theme’s customization options before installing extra plugins.
- Plugins offer quick, no-code solutions: Tools like WP Sticky or Header Footer Code Manager simplify the process for beginners.
- Custom CSS gives full control: Advanced users can add sticky behavior with a few lines of code via the Customizer.
- Elementor and other page builders include sticky settings: If you use Elementor, you can enable sticky headers directly in the design panel.
- Test on mobile devices: Ensure your sticky header works well and doesn’t block content on smaller screens.
- Avoid overloading with animations: Keep sticky headers clean and fast—excessive effects can slow down your site.
What Is a Sticky Header and Why Should You Use One?
A sticky header is a website navigation bar that stays fixed at the top of the screen as users scroll down the page. Unlike a static header that disappears out of view, a sticky header remains visible, making it easy for visitors to access menus, search bars, or call-to-action buttons at any time.
Using a sticky header improves user experience by reducing friction in navigation. Whether someone is reading a long blog post or browsing products on an eCommerce site, they won’t need to scroll back to the top to find a menu item. This small change can lead to higher engagement, lower bounce rates, and better conversions.
In this guide, you’ll learn how to create a sticky header in WordPress using four reliable methods: leveraging your theme’s built-in options, using page builders like Elementor, installing a dedicated plugin, or adding custom CSS. Each method is beginner-friendly, and we’ll walk you through every step.
Method 1: Use Your Theme’s Built-In Sticky Header Option
Many modern WordPress themes come with built-in support for sticky headers. Before installing plugins or writing code, check if your theme already offers this feature.
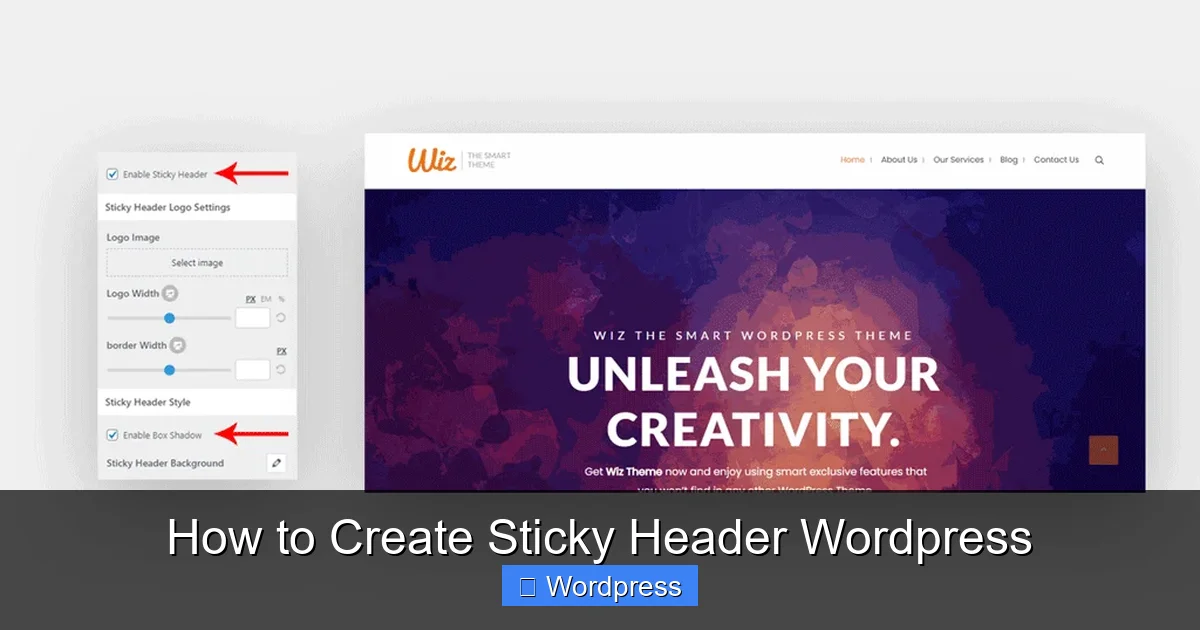
Visual guide about How to Create Sticky Header WordPress
Image source: wpwiz.io
Step 1: Go to the WordPress Customizer
Log in to your WordPress dashboard and navigate to Appearance > Customize. This opens the live theme customizer where you can preview changes in real time.
Step 2: Look for Header or Sticky Settings
Depending on your theme, look for sections labeled Header, Navigation, or Sticky Header. Popular themes like Astra, GeneratePress, and OceanWP include toggle switches for sticky headers.
Step 3: Enable the Sticky Header
Once you find the option, simply toggle it on. Some themes allow you to customize the sticky behavior—such as when it activates (e.g., after scrolling 100 pixels) or whether it shrinks in size.
Step 4: Publish Your Changes
Click Publish to save your settings. Visit your site and scroll down to confirm the header stays in place.
Pro Tip: If you’re using a lightweight theme like Astra, enabling the sticky header is often just one click away. This is the fastest and cleanest method if available.
Method 2: Create a Sticky Header with Elementor
If you use Elementor to design your WordPress site, you can create a sticky header without any plugins. Elementor Pro includes advanced motion effects, including sticky positioning.
Step 1: Edit Your Header Template
Go to Templates > Theme Builder in your WordPress dashboard. If you haven’t created a header template yet, click Add New and select Header.
Step 2: Design Your Header
Use Elementor’s drag-and-drop editor to build your header. Add a navigation menu, logo, search bar, or buttons as needed. Make sure the header section is wrapped in a container or section element.
Step 3: Enable Sticky Effect
Click on the header section or container. In the left panel, go to the Advanced tab and scroll down to Motion Effects. Under Sticky, select Top from the dropdown.
Step 4: Adjust Sticky Settings
You can set when the sticky effect starts (e.g., immediately or after scrolling). You can also enable Sticky on Scroll Up to show the header only when users scroll upward, saving screen space.
Step 5: Save and Preview
Click Update to save your template. Visit your site and test the sticky behavior on both desktop and mobile.
Note: This method requires Elementor Pro. If you’re using the free version, consider upgrading or using one of the other methods below. For more on building themes with Elementor, check out our guide on how to create a WordPress theme with Elementor.
Method 3: Use a WordPress Plugin for Sticky Headers
If your theme doesn’t support sticky headers and you’re not using Elementor, a plugin is the easiest solution. Plugins handle the technical work behind the scenes, making them ideal for beginners.
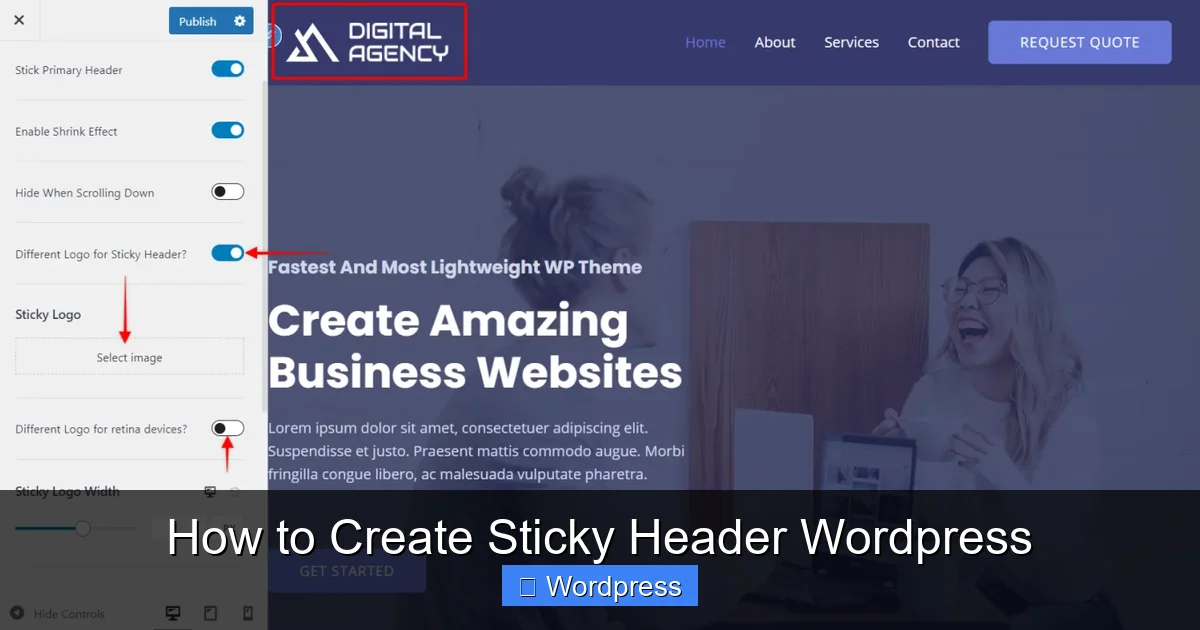
Visual guide about How to Create Sticky Header WordPress
Image source: wpastra.com
Step 1: Install a Sticky Header Plugin
Go to Plugins > Add New in your WordPress dashboard. Search for “WP Sticky” or “Sticky Menu (or Anything!) on Scroll.” Both are free, lightweight, and highly rated.
Step 2: Activate the Plugin
Click Install Now and then Activate. Once activated, the plugin will add a new settings menu to your dashboard.
Step 3: Configure the Sticky Element
Go to the plugin’s settings page. You’ll be asked to enter the CSS selector of the element you want to make sticky—usually your header or navigation menu.
To find the correct selector:
- Right-click your header in the browser and select Inspect.
- Look for the class or ID of the header container (e.g.,
.site-headeror#masthead). - Copy that selector into the plugin’s input field.
Step 4: Customize Appearance and Behavior
Most plugins let you adjust:
- The scroll distance before sticking
- Background color when sticky
- Fade-in or slide-down animations
- Mobile responsiveness
Save your settings and test the result. The header should now stick to the top when scrolling.
Recommendation: “Sticky Menu (or Anything!) on Scroll” is especially flexible—you can make not just headers sticky, but also sidebars, buttons, or banners.
Method 4: Add Custom CSS for a Sticky Header
For developers or users comfortable with code, adding a few lines of CSS is a clean and efficient way to create a sticky header. This method gives you full control and avoids plugin bloat.
Step 1: Identify Your Header’s CSS Class or ID
Use your browser’s inspect tool to find the header element. Common selectors include:
.site-header#masthead.main-navigation
Step 2: Add CSS via the Customizer
Go to Appearance > Customize > Additional CSS. Paste the following code, replacing .site-header with your actual selector:
.site-header {
  position: sticky;
  top: 0;
  z-index: 999;
  background: #ffffff;
  box-shadow: 0 2px 5px rgba(0,0,0,0.1);
}
Step 3: Adjust for Mobile and Admin Bar
If you’re logged in, WordPress shows an admin bar at the top. To prevent overlap, add:
body.admin-bar .site-header {
  top: 32px;
}
For mobile responsiveness, consider adding media queries to adjust padding or font size on smaller screens.
Step 4: Publish and Test
Click Publish and test your site. The header should now stick to the top when scrolling.
For more advanced styling tips, including how to add CSS effectively, see our article on the best way to add CSS in WordPress.
Troubleshooting Common Sticky Header Issues
Even with the right method, you might run into problems. Here’s how to fix the most common ones:
Header Overlaps Content
If your sticky header covers part of the page content, add padding to the top of your main content area. For example:
.main-content {
  padding-top: 80px;
}
Sticky Header Doesn’t Work on Mobile
Some themes or plugins disable sticky behavior on mobile to save space. Check your plugin or theme settings for a “Disable on Mobile” option and turn it off if needed.
Header Jitters or Flickers
This usually happens due to conflicting CSS or JavaScript. Try disabling other plugins one by one to find the culprit. Also, ensure your z-index is high enough (999 or above).
Admin Bar Causes Misalignment
As mentioned earlier, logged-in users see the WordPress admin bar. Use the body.admin-bar selector to adjust the sticky header’s position accordingly.
Conclusion
Adding a sticky header to your WordPress site is a simple yet powerful way to improve navigation and keep visitors engaged. Whether you use your theme’s built-in option, a plugin, Elementor, or custom CSS, the process is straightforward and doesn’t require advanced skills.
Start by checking if your theme supports sticky headers—this is often the quickest fix. If not, plugins like WP Sticky offer a no-code solution, while custom CSS gives developers full flexibility. And if you’re already using Elementor, take advantage of its powerful motion effects to create a smooth, professional sticky header.
Remember to test your sticky header on different devices and browsers to ensure a consistent experience. With the right setup, your visitors will enjoy seamless navigation, and your site will look more polished and user-friendly.