This guide shows you how to edit sitemap in WordPress using popular plugins like Yoast SEO or Rank Math, manual XML editing, or custom code. You’ll also learn how to exclude pages, fix errors, and keep your site structure SEO-friendly.
Key Takeaways
- Use SEO plugins: Tools like Yoast SEO and Rank Math automatically generate and let you edit sitemaps with simple settings.
- Manual editing is possible: You can modify the sitemap.xml file directly via FTP or file manager if needed.
- Exclude unwanted pages: Prevent private, duplicate, or low-value pages from appearing in your sitemap to improve SEO.
- Check for errors: Use Google Search Console to monitor sitemap issues and ensure search engines crawl your site properly.
- Update after changes: Always resubmit your sitemap after making edits to keep search engines informed.
- Avoid broken links: Regularly audit your sitemap to remove outdated or deleted pages that could harm your rankings.
- Child themes help: When adding custom code, use a child theme to prevent losing changes during updates.
What Is a Sitemap and Why Edit It?
A sitemap is a file that lists all the important pages on your WordPress website. It helps search engines like Google discover and crawl your content more efficiently. While WordPress automatically creates a basic HTML sitemap for visitors, it doesn’t generate a full XML sitemap by default—this is where editing becomes essential.
Editing your sitemap allows you to:
– Remove pages you don’t want indexed (like thank-you pages or admin areas)
– Add custom URLs not detected automatically
– Improve crawl efficiency for better SEO
– Fix errors reported in Google Search Console
Whether you’re a blogger, small business owner, or web developer, knowing how to edit sitemap in WordPress gives you greater control over how your site appears in search results.
Method 1: Edit Sitemap Using Yoast SEO Plugin
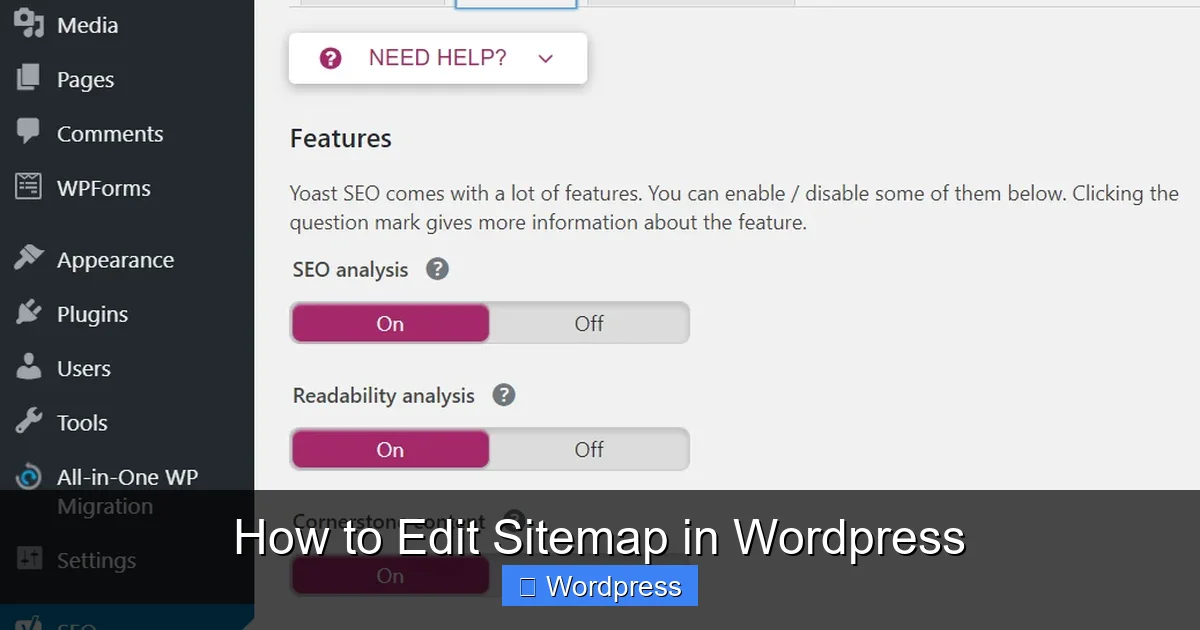
Visual guide about How to Edit Sitemap in WordPress
Image source: static.semrush.com
Yoast SEO is one of the most popular SEO plugins for WordPress. It creates a dynamic XML sitemap and offers easy editing options.
Step 1: Install and Activate Yoast SEO
If you haven’t already, go to Plugins > Add New in your WordPress dashboard. Search for “Yoast SEO,” install it, and activate it.
Step 2: Access Sitemap Settings
Once activated, go to SEO > General > Features. Make sure the “XML sitemaps” option is turned on. You’ll see a link to view your sitemap—usually yoursite.com/sitemap_index.xml.
Step 3: Exclude Pages from the Sitemap
To remove specific pages:
– Go to SEO > Search Appearance
– Click the Content Types tab
– Under “Posts” or “Pages,” toggle off inclusion for certain post types
– For individual pages, edit the page, scroll down to the Yoast SEO box, click “Advanced,” and check “Exclude from sitemap”
Pro Tip: Exclude pages like login, privacy policy, or duplicate content to keep your sitemap clean and focused.
Step 4: Customize Sitemap Structure
Yoast lets you control which post types, taxonomies, and archives appear. For example, you can disable category or tag sitemaps if they’re not useful for your site.
Step 5: Resubmit to Search Engines
After making changes, go to Google Search Console and resubmit your sitemap under “Sitemaps” to ensure updates are processed.
Method 2: Edit Sitemap Using Rank Math
Visual guide about How to Edit Sitemap in WordPress
Image source: static.semrush.com
Rank Math is another powerful SEO plugin with advanced sitemap controls.
Step 1: Install Rank Math
Navigate to Plugins > Add New, search for “Rank Math SEO,” install, and activate it. Complete the setup wizard.
Step 2: Enable Sitemap Functionality
Go to Rank Math > General Settings > Sitemap. Toggle “Enable Sitemap” to ON. Your sitemap will be available at yoursite.com/sitemap_index.xml.
Step 3: Exclude Content Types or Individual Items
In the same Sitemap settings:
– Choose which post types (posts, pages, products) to include
– Exclude specific categories, tags, or authors
– Use the “Exclude Posts” field to enter IDs of pages you want removed
To find a page ID, go to Pages > All Pages, hover over a page title, and check the URL in your browser—the ID appears as post=123.
Step 4: Add Custom URLs
If you have external pages or custom routes not managed by WordPress, use the “Additional Pages” section to add them manually.
Step 5: Test and Submit
Visit your sitemap URL to confirm changes. Then submit it again in Google Search Console.
Method 3: Manually Edit Sitemap via FTP or File Manager
If you prefer full control or aren’t using an SEO plugin, you can edit the sitemap manually.
Step 1: Locate Your Sitemap File
Most WordPress sites store the sitemap at the root directory as sitemap.xml or sitemap_index.xml. Access it via:
– FTP client (like FileZilla)
– Hosting control panel’s File Manager
Step 2: Download and Edit the File
Download the sitemap file to your computer. Open it in a text editor like Notepad++ or VS Code.
Look for entries like:
To remove a page, delete its entire
Step 3: Re-upload the Updated File
Save your changes and upload the file back to the server, overwriting the old version.
Warning: Manual editing is risky. Always backup the original file first. Also, note that some plugins or themes may regenerate the sitemap and overwrite your changes.
Method 4: Custom Code in functions.php
For developers, you can modify the sitemap using WordPress hooks.
Step 1: Use a Child Theme
Always make code changes in a child theme to avoid losing edits during theme updates. If you’re not using one, learn how to create a WordPress theme with Elementor or set up a child theme properly.
Step 2: Add Filter to Exclude Pages
Add this code to your child theme’s functions.php file to exclude specific pages by ID:
add_filter('wpseo_exclude_from_sitemap', function($exclude, $post_id) {
    $excluded_ids = array(10, 25, 42); // Replace with your page IDs
    if (in_array($post_id, $excluded_ids)) {
        return true;
    }
    return $exclude;
}, 10, 2);
This works with Yoast SEO. For other plugins, check their documentation for similar filters.
Step 3: Clear Cache and Test
After adding code, clear any caching plugins and visit your sitemap to verify the changes.
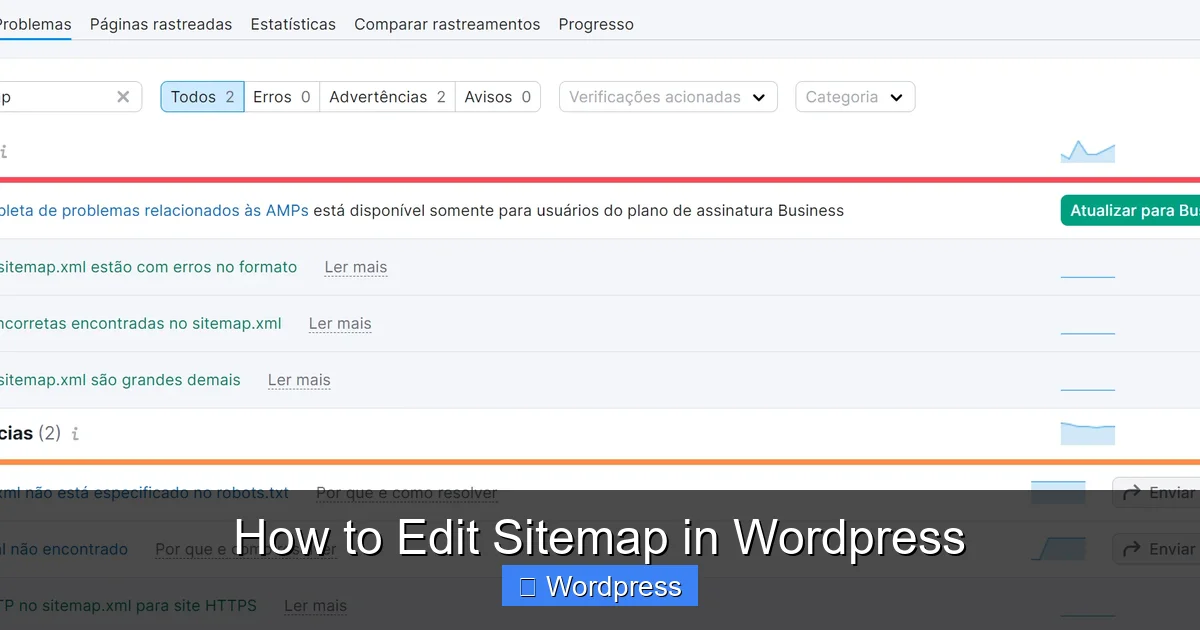
Troubleshooting Common Sitemap Issues
Even with careful editing, problems can arise. Here’s how to fix them:
Sitemap Not Updating
– Clear plugin and server cache
– Resave permalinks under Settings > Permalinks
– Ensure your plugin is active and configured correctly
404 Error on Sitemap URL
This often means the sitemap isn’t generated. Check if your SEO plugin is active. If using manual sitemap, verify the file exists and has proper permissions (644).
Broken or Missing Links
Use tools like Fix Broken Links in WordPress Without Plugin to scan your site. Remove or update any dead URLs in your sitemap.
Google Search Console Errors
If Google reports “Couldn’t fetch” or “Invalid XML,” validate your sitemap using an online XML validator. Fix any syntax errors before resubmitting.
Best Practices for Managing Your Sitemap
– Update regularly: Whenever you publish or delete content, review your sitemap.
– Keep it clean: Only include high-quality, indexable pages.
– Monitor performance: Use Google Search Console to track indexing status.
– Use HTTPS: Ensure all URLs in your sitemap use https://.
– Avoid duplicates: Don’t list the same page under multiple URLs (e.g., with and without www).
Conclusion
Editing your sitemap in WordPress doesn’t have to be complicated. Whether you use a plugin like Yoast SEO or Rank Math, edit manually, or add custom code, you now have the tools to shape how search engines see your site. Remember to exclude low-value pages, fix broken links, and resubmit your sitemap after changes. With a clean, accurate sitemap, you’ll help search engines crawl your site more effectively—leading to better visibility and higher rankings.