This guide walks you through installing a WordPress theme in Bluehost using the dashboard or manual upload. You’ll learn safe practices, troubleshooting tips, and how to activate your new design quickly.
Key Takeaways
- Access your WordPress dashboard: Log in via Bluehost to begin theme installation.
- Choose installation method: Use the built-in uploader or FTP for manual theme uploads.
- Always back up first: Protect your site before making design changes.
- Activate after upload: Themes must be activated to appear on your live site.
- Use child themes for safety: Preserve customizations during updates.
- Troubleshoot common errors: Fix issues like missing stylesheets or permission errors.
- Optimize for performance: Pick fast, SEO-friendly themes for better results.
How to Install WordPress Theme in Bluehost: A Complete Guide
So, you’ve got your Bluehost hosting set up and your WordPress site is live—great! Now it’s time to give your website a fresh look by installing a new WordPress theme. Whether you’re going for a sleek business layout, a bold blog design, or an eCommerce-ready template, installing a theme in Bluehost is simple—even if you’re not tech-savvy.
In this guide, I’ll show you how to install a WordPress theme in Bluehost using two reliable methods: through the WordPress dashboard and via manual upload. You’ll also learn best practices to keep your site safe and running smoothly. By the end, you’ll have a beautiful, functional theme ready to impress your visitors.
Why Install a WordPress Theme in Bluehost?
Bluehost is one of the most popular hosting providers for WordPress, and for good reason. It offers one-click WordPress installation, reliable uptime, and seamless integration with the WordPress ecosystem. Installing a theme in Bluehost gives you full control over your site’s design without needing to code.
With thousands of free and premium themes available, you can customize everything from fonts and colors to layouts and navigation menus. Whether you’re building a portfolio, online store, or personal blog, the right theme makes all the difference.
Before You Begin: Essential Preparations
Before diving into the installation, take a few minutes to prepare. This will save you headaches later.
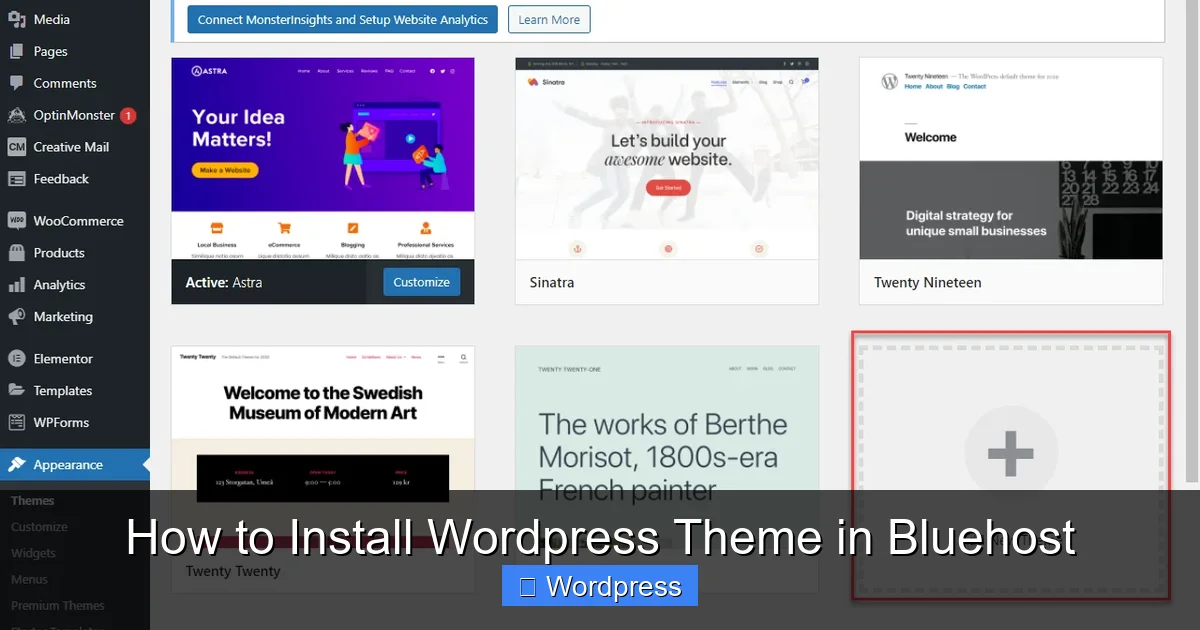
Visual guide about How to Install WordPress Theme in Bluehost
Image source: content.bluehost.com
1. Back Up Your Website
Always create a full backup of your site before installing a new theme. If something goes wrong, you can restore your previous version quickly. Use a plugin like UpdraftPlus or your Bluehost backup tool.
2. Check Theme Compatibility
Make sure the theme you choose is compatible with your current WordPress version. Most modern themes support the latest WordPress updates, but it’s always good to double-check.
3. Download the Theme File
If you’re using a premium theme, download the .zip file from the provider (like ThemeForest or Elegant Themes). For free themes, you can install them directly from the WordPress directory.
Method 1: Install WordPress Theme via Bluehost Dashboard (Easiest)
This is the most beginner-friendly method. You don’t need any technical skills—just a few clicks.
Step 1: Log in to Your Bluehost Account
Go to Bluehost.com and log in. From the dashboard, click on “My Sites” and select the site you want to update.
Step 2: Access WordPress Admin
Click the “Log in to WordPress” button. This will take you directly to your site’s WordPress dashboard.
Step 3: Navigate to Appearance > Themes
In the left sidebar, hover over Appearance and click Themes. You’ll see a list of currently installed themes.
Step 4: Add a New Theme
Click the “Add New” button at the top of the page. You can now browse free themes from the WordPress directory or upload your own.
Step 5: Upload a Custom Theme (ZIP File)
If you have a premium theme, click “Upload Theme” and choose the .zip file from your computer. Then click “Install Now.”
Step 6: Activate the Theme
Once installed, click “Activate” to make it live on your site. Your new design will appear immediately.
Pro Tip: After activation, visit your site to make sure everything looks correct. Some themes require additional setup, like importing demo content or installing recommended plugins.
Method 2: Manually Install WordPress Theme via FTP
If the dashboard method fails—or you prefer more control—you can upload the theme manually using FTP. This is useful for large theme files or when your hosting has upload limits.
Step 1: Download and Extract the Theme
Download the theme .zip file to your computer. Right-click and extract it. You should now have a folder with the theme name (e.g., “astra” or “oceanwp”).
Step 2: Connect to Your Site via FTP
Use an FTP client like FileZilla. Enter your Bluehost FTP credentials:
- Host: Your domain name (e.g., ftp.yoursite.com)
- Username: Your Bluehost FTP username
- Password: Your FTP password
- Port: 21 (default)
You can find these details in your Bluehost control panel under “FTP Accounts.”
Step 3: Upload the Theme Folder
Navigate to /wp-content/themes/ on your server. Drag and drop the extracted theme folder into this directory.
Step 4: Activate the Theme in WordPress
Go back to your WordPress dashboard. Under Appearance > Themes, you should now see your uploaded theme. Click “Activate.”
Note: If the theme doesn’t appear, double-check that the folder was uploaded to the correct location and that it contains a valid style.css file.
Troubleshooting Common Issues
Even with careful steps, things can go wrong. Here’s how to fix the most common problems.
“Missing Stylesheet” Error
This happens when WordPress can’t find the theme’s main CSS file. It usually means the theme folder wasn’t uploaded correctly. Make sure the style.css file is inside the theme folder, not in a subfolder.
“File Size Too Large” Error
Bluehost has upload limits (usually 2MB–64MB). If your theme is larger, use the FTP method instead of the dashboard uploader.
Theme Looks Broken After Activation
This could be due to missing plugins or incorrect settings. Check the theme documentation for required plugins. Also, clear your browser and site cache.
White Screen of Death
If your site goes blank after activating a theme, it might be a PHP error. Reconnect via FTP, rename the theme folder (e.g., “mytheme-old”), and WordPress will revert to the default theme. Then investigate the issue.
Best Practices After Installing a Theme
Installing the theme is just the beginning. Follow these tips to get the most out of your new design.
1. Use a Child Theme for Customizations
Never edit theme files directly. Use a child theme to make changes. This protects your work when the parent theme updates. Learn more about what is a child theme in WordPress and why it’s essential.
2. Install Recommended Plugins
Many themes suggest plugins for sliders, contact forms, or SEO. Install them to unlock full functionality.
3. Import Demo Content (If Available)
Premium themes often include demo content. Use the one-click import tool to set up pages, menus, and widgets quickly.
4. Optimize for Speed and SEO
Choose lightweight themes that load fast. Check out our guide on the best WordPress theme for SEO and speed to find top performers.
5. Test on Mobile Devices
Ensure your theme is responsive. View your site on a phone or tablet to confirm it looks good on all screens.
How to Update or Change Your Theme Later
As your site grows, you might want to switch themes or update the current one. Here’s how:
Updating a Theme
Go to Dashboard > Updates. If a theme update is available, click “Update Now.” Always back up first. For more details, see our guide on how to update a theme on WordPress.
Switching to a New Theme
Install the new theme using the steps above. Preview it before activating. Once ready, activate it and deactivate the old one. Learn how to deactivate a theme in WordPress safely.
Conclusion
Installing a WordPress theme in Bluehost is a straightforward process that can dramatically improve your site’s look and functionality. Whether you use the dashboard uploader or FTP, following these steps ensures a smooth experience.
Remember to back up your site, choose a reliable theme, and use a child theme for customizations. With the right theme, your website will not only look professional but also perform better for visitors and search engines.
Now that you know how to install a WordPress theme in Bluehost, it’s time to explore the thousands of designs available and find the perfect fit for your brand. Happy designing!