This guide shows you how to edit footer in WordPress using Elementor, whether you’re using a theme with built-in support or creating a custom footer from scratch. You’ll learn to use Elementor’s drag-and-drop tools to design, customize, and publish a professional-looking footer in minutes.
Key Takeaways
- Elementor supports footer editing through Theme Builder, allowing full customization without coding.
- You can create global footers that appear on every page, ensuring consistency across your site.
- Use Elementor widgets like menus, social icons, and forms to enhance footer functionality.
- Styling options include colors, fonts, spacing, and responsive controls for mobile optimization.
- Always preview changes before publishing to avoid layout issues on live pages.
- Back up your site before making major design changes to prevent data loss.
- Combine Elementor with child themes for safer, long-term customizations.
Introduction: Why Edit Your Footer with Elementor?
The footer is one of the most overlooked parts of a website—yet it plays a crucial role in user experience, SEO, and branding. Whether you want to add contact information, social links, a newsletter signup, or copyright text, knowing how to edit footer in WordPress using Elementor gives you full creative control.
Elementor, one of the most popular page builders for WordPress, makes it easy to design and customize every part of your site—including the footer. With its intuitive drag-and-drop interface and powerful Theme Builder feature, you can create a professional, responsive footer without touching a line of code.
In this guide, you’ll learn how to access, edit, and style your footer using Elementor. We’ll cover both built-in theme footers and custom footers created with Elementor’s Theme Builder. By the end, you’ll be able to design a footer that matches your brand and improves your site’s functionality.
Prerequisites: What You Need Before Starting
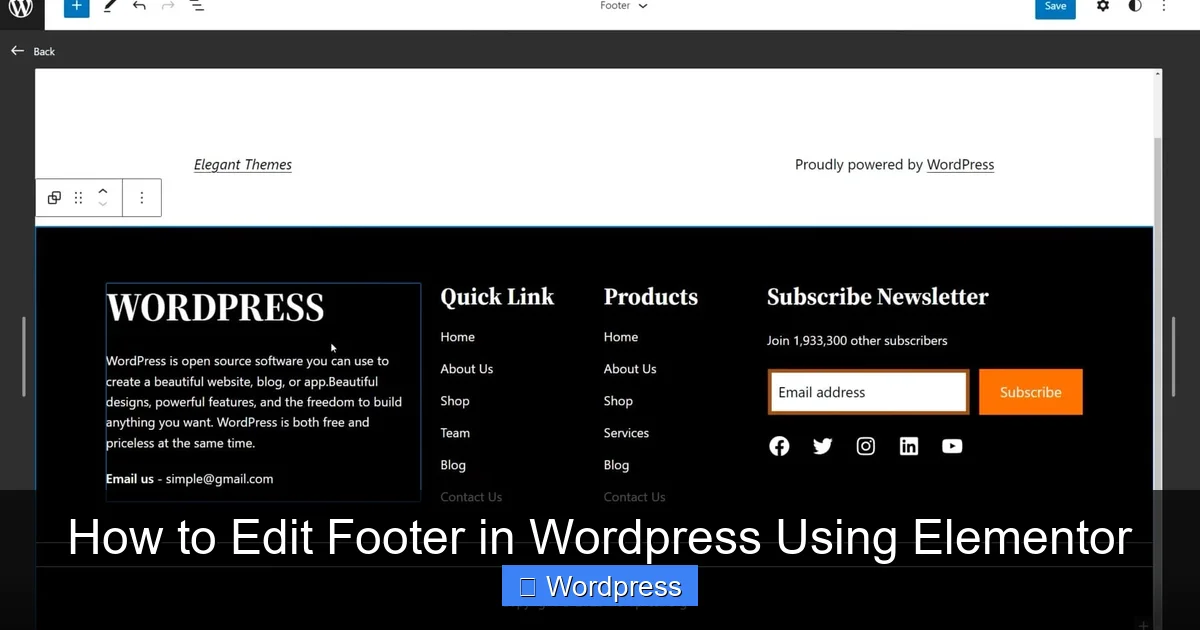
Visual guide about How to Edit Footer in WordPress Using Elementor
Image source: elegantthemes.com
Before diving into footer editing, make sure you have the following:
- WordPress installed on your hosting account.
- Elementor plugin activated (free or Pro version).
- An Elementor-compatible theme (like Hello Elementor, Astra, or GeneratePress).
- Elementor Pro (recommended) for full Theme Builder access, including footer editing.
Note: While the free version of Elementor allows basic editing, creating a custom footer requires Elementor Pro’s Theme Builder feature.
If you’re using a theme that doesn’t support Elementor’s footer editing, consider switching to a compatible one. For help choosing or applying a new theme, check out our guide on how to apply a WordPress theme.
Step 1: Access Elementor’s Theme Builder
To edit your footer with Elementor, you’ll use the Theme Builder—a powerful tool that lets you design headers, footers, single posts, and more.
Open the Theme Builder
- Log in to your WordPress dashboard.
- Go to Elementor > Theme Builder.
- You’ll see sections for Header, Footer, Single, Archive, and more.
Check for Existing Footer Templates
If your theme already includes a footer template, it will appear under the Footer section. You can edit it directly. If not, you’ll need to create one.
Step 2: Create or Edit a Footer Template
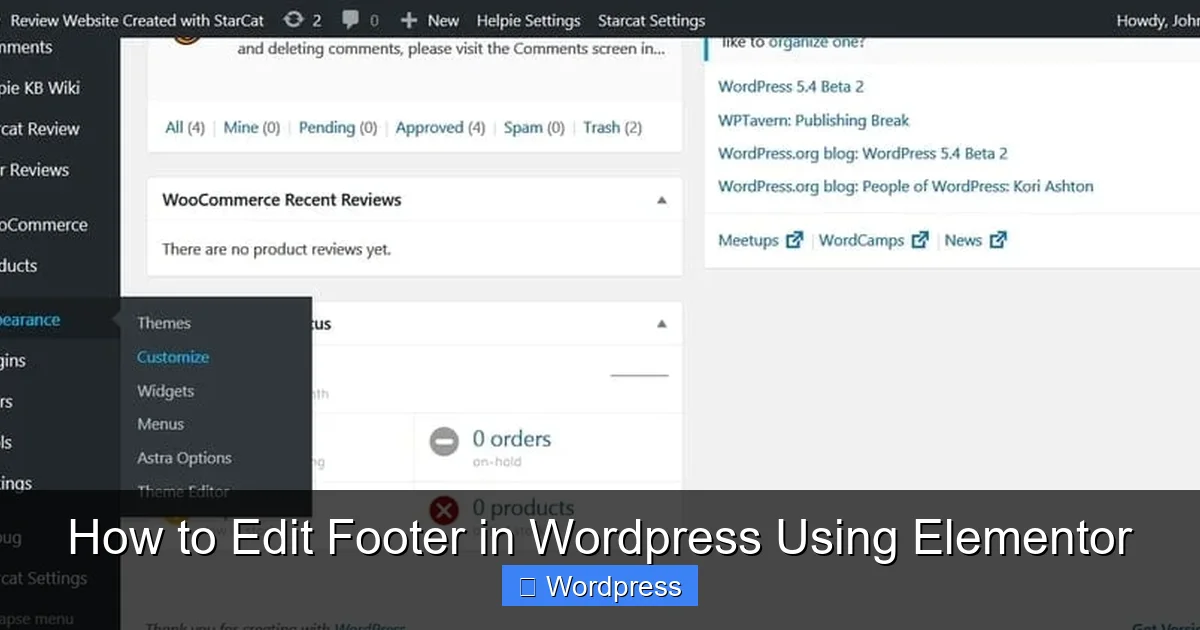
Visual guide about How to Edit Footer in WordPress Using Elementor
Image source: helpiewp.com
Now it’s time to build or modify your footer.
Create a New Footer (If None Exists)
- In the Theme Builder, click Add New next to Footer.
- Choose a template (blank or pre-designed) or start from scratch.
- Click Edit with Elementor to open the editor.
Edit an Existing Footer
- Hover over the existing footer template and click Edit.
- The Elementor editor will load with your current footer design.
Step 3: Design Your Footer Layout
With the editor open, you can now customize your footer using Elementor’s widgets and layout tools.
Add Sections and Columns
- Click the + icon to add a new section.
- Choose a column structure (e.g., 3 columns for links, contact info, and social icons).
- Drag and drop widgets into each column.
Use Essential Widgets
Here are some popular widgets to include:
- Heading: For titles like “Contact Us” or “Quick Links”.
- Text Editor: Add copyright text or company info.
- Menu: Insert a navigation menu (requires WordPress menu setup).
- Social Icons: Link to your Facebook, Instagram, Twitter, etc.
- Shortcode: Embed forms, maps, or other plugins.
- Image: Add your logo or a background image.
Example: A Simple 3-Column Footer
- Column 1: Company logo and tagline.
- Column 2: Quick links (Home, About, Services, Contact).
- Column 3: Social icons and email signup form.
Step 4: Style Your Footer
Once your content is in place, it’s time to make it look great.
Adjust Colors and Backgrounds
- Select the section or widget you want to style.
- Go to the Style tab in the left panel.
- Change background color, text color, or add a gradient.
- Use a dark background with light text for a modern look.
Customize Typography
- Select headings or text elements.
- Adjust font family, size, weight, and line height.
- Ensure readability on all devices.
Set Spacing and Padding
- Use the Advanced tab to control margins and padding.
- Add space between columns and sections for a clean layout.
- Test different values to find the perfect balance.
Make It Responsive
- Click the Responsive Mode icon (desktop, tablet, mobile).
- Adjust column stacking, font sizes, and spacing for smaller screens.
- Hide less important elements on mobile if needed.
Step 5: Set Display Conditions
To ensure your footer appears where you want it, set display conditions.
Assign the Footer Globally
- In the Theme Builder, go to your footer template.
- Click Edit Conditions.
- Choose Entire Site to show the footer on all pages.
- Or select specific pages, posts, or categories.
Exclude Certain Pages (Optional)
If you don’t want the footer on the homepage or login page, use the “Exclude” option in conditions.
Step 6: Publish and Preview
Before going live, always preview your changes.
Save and Publish
- Click Update or Publish in the Elementor editor.
- Go to Elementor > Theme Builder and ensure the footer is active.
Test on Different Devices
- Visit your website on desktop, tablet, and mobile.
- Check for alignment, readability, and functionality.
- Fix any issues using the responsive controls.
Troubleshooting Common Issues
Even with a powerful tool like Elementor, you might run into problems. Here’s how to fix them.
Footer Not Showing Up
- Check if the footer template is published and assigned to the correct conditions.
- Ensure your theme supports Elementor’s Theme Builder.
- Clear your cache (plugin or browser).
Layout Breaks on Mobile
- Use responsive mode to adjust column widths and font sizes.
- Avoid fixed widths; use percentages or auto-sizing.
- Test with real devices, not just simulators.
Conflicts with Theme or Plugins
- Switch to a default theme (like Hello Elementor) to test.
- Deactivate plugins one by one to find the culprit.
- For help managing themes, see our guide on how to deactivate a WordPress theme.
Changes Not Saving
- Make sure you’re using Elementor Pro for footer editing.
- Check file permissions on your server.
- Try saving in a different browser or incognito mode.
Pro Tips for a Better Footer
- Keep it simple: Don’t overcrowd your footer with too many links or widgets.
- Use consistent branding: Match colors and fonts to your header and overall design.
- Add a call-to-action: Encourage email signups or social follows.
- Include legal pages: Link to Privacy Policy, Terms of Service, etc.
- Update regularly: Keep contact info and links current.
For advanced styling, consider adding custom CSS. Learn more in our article on the best way to add CSS in WordPress.
Conclusion
Editing your footer in WordPress using Elementor is a straightforward process that can significantly improve your site’s professionalism and usability. With Elementor’s Theme Builder, you can create a custom footer that’s visually appealing, functional, and responsive—no coding required.
Whether you’re adding social links, a newsletter form, or just cleaning up the layout, Elementor gives you the tools to do it all. Remember to preview your changes, test on multiple devices, and keep your design consistent with the rest of your site.
Now that you know how to edit footer in WordPress using Elementor, take the time to refine your footer and make it work harder for your brand. A well-designed footer isn’t just an afterthought—it’s a key part of your website’s success.