This guide walks you through the process of submitting your WordPress site to Google Search Console and ensuring it gets indexed. You’ll learn how to generate a sitemap, verify your site, and submit it to Google—all using built-in WordPress tools and free plugins.
Key Takeaways
- Verify your site in Google Search Console: This is the first step to monitor how Google sees your WordPress site.
- Generate an XML sitemap: Use plugins like Yoast SEO or Rank Math to create a sitemap that Google can crawl easily.
- Submit your sitemap to Google: Manually submit your sitemap in Search Console to speed up indexing.
- Ensure your site is crawlable: Check robots.txt and settings to make sure Google bots can access your content.
- Monitor indexing status: Use Search Console to track which pages are indexed and fix any issues.
- Update your theme for better SEO: A well-optimized theme improves crawlability and search rankings.
- Be patient but proactive: Indexing takes time, but regular updates and clean content help Google discover your site faster.
Why Submitting Your WordPress Site to Google Matters
When you launch a new WordPress website, it doesn’t automatically appear in Google search results. Even if your site is live, Google may not know it exists—or it might take weeks to discover it on its own. That’s why submitting your site to Google is a critical step for visibility, traffic, and SEO success.
By submitting your site through Google Search Console, you give Google a direct roadmap of your content. This helps search engines crawl and index your pages faster, improving your chances of ranking for relevant keywords. Whether you’re running a blog, portfolio, or online store, getting indexed quickly means reaching your audience sooner.
In this guide, you’ll learn exactly how to submit your WordPress site to Google using free tools and built-in features. We’ll cover everything from setting up Google Search Console to generating and submitting a sitemap—no coding required.
Step 1: Set Up Google Search Console
Google Search Console (formerly Webmaster Tools) is a free service that helps you monitor and maintain your site’s presence in Google Search. It’s the official way to submit your site and track how Google interacts with it.
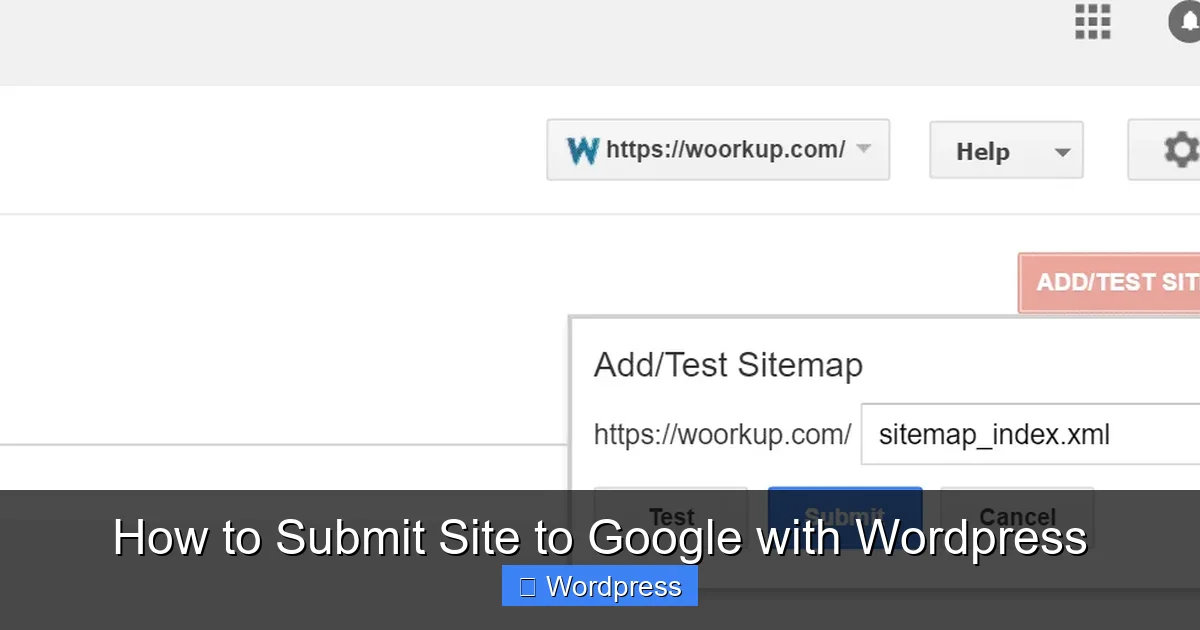
Visual guide about How to Submit Site to Google with WordPress
Image source: woorkup.com
Create a Google Search Console Account
- Go to search.google.com/search-console and sign in with your Google account.
- Click “Start now” and enter your website URL (e.g., https://yourwebsite.com).
- Choose the “URL prefix” option and click “Continue.”
Verify Your Website Ownership
Google needs to confirm you own the site. There are several verification methods, but the easiest for WordPress users is the HTML tag method.
- In Search Console, select “HTML tag” and copy the meta tag provided.
- In your WordPress dashboard, go to Appearance > Theme File Editor or use a plugin like Insert Headers and Footers.
- Paste the meta tag into the
<head>section of your site. - Return to Search Console and click “Verify.”
Tip: If you’re using a SEO plugin like Yoast or Rank Math, they often include built-in Search Console verification. Check their settings under “Webmaster Tools” or “General.”
Step 2: Generate an XML Sitemap
An XML sitemap is a file that lists all the important pages on your site. It acts like a table of contents for Google, helping it discover and crawl your content efficiently.
Visual guide about How to Submit Site to Google with WordPress
Image source: scootorlando.com
Use a SEO Plugin to Create a Sitemap
The easiest way to generate a sitemap in WordPress is with a SEO plugin. Two popular options are Yoast SEO and Rank Math.
- Install and activate Yoast SEO from the WordPress plugin directory.
- Go to SEO > General > Features and make sure “XML sitemaps” is enabled.
- Your sitemap will be available at:
https://yourwebsite.com/sitemap_index.xml
Alternatively, if you use Rank Math:
- Go to Rank Math > General Settings > Sitemap.
- Enable the sitemap and customize which post types to include.
- Access your sitemap at:
https://yourwebsite.com/sitemap_index.xml
Note: Most modern WordPress themes are compatible with these plugins. If you’ve recently applied a new WordPress theme, double-check that your sitemap still generates correctly.
Step 3: Submit Your Sitemap to Google
Now that your sitemap is ready, it’s time to submit it to Google Search Console.
Submit the Sitemap Manually
- In Google Search Console, click on “Sitemaps” in the left menu.
- Under “Add a new sitemap,” paste your sitemap URL (e.g.,
https://yourwebsite.com/sitemap_index.xml). - Click “Submit.”
Google will now begin crawling your site based on the sitemap. You’ll see a status update like “Success” or “Processing” within minutes.
Monitor Sitemap Status
After submission, check back in Search Console to see:
- How many pages were discovered
- Any errors (e.g., blocked by robots.txt, 404 errors)
- Last crawl date
If you see errors, fix them promptly. For example, if a page is blocked, check your robots.txt file or plugin settings.
Step 4: Ensure Your Site Is Crawlable
Even with a sitemap, Google can’t index your site if it’s blocked from crawling. Here’s how to make sure your WordPress site is accessible.
Check Your robots.txt File
The robots.txt file tells search engines which pages to crawl or avoid. You can view it at: https://yourwebsite.com/robots.txt
A basic, crawl-friendly robots.txt should look like this:
User-agent: *
Allow: /
Sitemap: https://yourwebsite.com/sitemap_index.xml
If your site is blocking all bots (e.g., Disallow: /), Google won’t index anything. To fix this:
- Go to Settings > Reading in WordPress.
- Make sure “Discourage search engines from indexing this site” is unchecked.
- If using a plugin like Yoast, go to SEO > Tools > File editor to modify robots.txt.
Optimize Your Theme for SEO
Some WordPress themes are poorly coded and can slow down crawling. A fast, clean theme improves SEO and indexing speed. Consider using a WordPress theme optimized for SEO and speed to ensure Google can efficiently crawl your site.
Step 5: Monitor Indexing and Fix Issues
After submitting your site, use Google Search Console to track progress.
Check the Index Coverage Report
- In Search Console, go to “Indexing > Pages.”
- You’ll see a list of indexed pages, along with errors or warnings.
- Click on any error (e.g., “Crawled – not indexed”) to see details and suggested fixes.
Request Indexing for New Pages
If you’ve published a new post or page and it’s not showing up:
- In Search Console, use the “URL Inspection” tool.
- Paste the page URL and click “Test Live URL.”
- If it passes, click “Request Indexing.”
This tells Google to recrawl and index the page immediately.
Troubleshooting Common Issues
Sometimes, even after following all steps, your site may not get indexed. Here’s how to fix common problems.
Problem: Google Can’t Access Your Site
Solution: Check if your site is down or blocking bots. Use tools like Down For Everyone Or Just Me to test accessibility. Also, ensure your hosting isn’t blocking Googlebot.
Problem: Sitemap Returns a 404 Error
Solution: This means the sitemap isn’t generating. Re-save your permalinks in Settings > Permalinks and clear your cache. If using a plugin, reactivate it.
Problem: Pages Are Discouraged from Indexing
Solution: Some plugins or themes add noindex tags. Check your SEO plugin settings and remove any unintended noindex rules.
Final Tips for Faster Indexing
- Publish high-quality content regularly: Google favors active sites.
- Use internal linking: Link new posts to existing ones to help Google discover them.
- Share on social media: While not a direct ranking factor, social shares can drive traffic and signal fresh content to Google.
- Avoid duplicate content: Use unique titles and meta descriptions for each page.
Remember, indexing isn’t instant. It can take anywhere from a few hours to several days. But by submitting your site properly and maintaining good SEO practices, you’ll give your WordPress site the best chance to rank.
Conclusion
Submitting your WordPress site to Google doesn’t have to be complicated. With Google Search Console and a reliable SEO plugin, you can get your site indexed quickly and start attracting organic traffic. From verifying ownership to submitting your sitemap and monitoring performance, each step brings you closer to better visibility.
Don’t forget to keep your site updated, use a fast theme, and fix any crawl errors promptly. Over time, these efforts will pay off with higher rankings and more visitors. Now that you know how to submit your site to Google, take action today and watch your WordPress site grow.